
Editor's Note: This series of posts became a book!
Stuffed Animals: From Concept to Construction was published by Lark Crafts in 2013.
+++++
I'm so glad that you are as excited as I am to delve into the topic of soft toy design! I find this subject totally absorbing and I am always learning new ways to design and construct softies. Please keep adding your own knowledge at the end of these posts so that we can all refer back and gain new skills.
Today I want to show how to draft a pattern for a very simple soft toy, what I would call an outline toy. I am going to be making a simple elephant softie.
One of the first steps in creating a softie pattern is distilling the animal's shapes to the essentials. What do you need to have in order for the viewer to know that you are making an elephant?
I began by doing a little visual research. I used Google Images to find some good photos. Here are is what came up in my image search for "elephant."

From here I started sketching, trying to notice the basic shapes and the most important features.


When designign a new sofite I like to also take a look at commercially produced stuffed animals because these show me how other artists have already simplified the animal. Here is what came up in my image search for "elephant stuffed animals."

From here I did some more sketching.

I assure you that you do not need superb drawing skills to be able to go through this process. What you are aiming for is a good, solid line drawing of the animal in profile, almost like a page from a coloring book. Just a solid, confident line.
An outline toy can also be head on, like this siamese cat.
It is okay to exaggerate the most essential elements like the elephant's trunk and wide feet.
Next, I transfer the profile drawing to freezer paper. I draw the ears and the tail and any other parts, too.
Cut out the pattern pieces and label them all with the name of the pattern, what piece each one is, and how many you'll need of each one and any other relevant information. Also, be sure to mark a 1"-2" spot that you will leave open for turning and stuffing later. Here is how my pattern pieces look:


Iron the freezer paper to some fabric. I used gray wool felt.
I want to attach the ears now because I want them to be machine sewn so that the seam will be neat and strong. I am going to attach them through a slit in the body pieces. With a marker I mark the location of the slit. I pull off the pattern piece and cut the slit.

Then, I slide the edge of one ear into the opening in the right side of one body piece, pin it in place and sew across the opening, trapping the ear in the seam. The ears on my mouse ornament pattern also employs this technique if you'd like to try it.
Now readhere the pattern piece.
I'm also going to trap the top of the tail in the seam so that it will be machine sewn in place. I place the tail inside the body with just the tip sticking out past the edge of the pattern. Pin it in place so that it will be trapped between the two body pieces when I sew around the elephant.
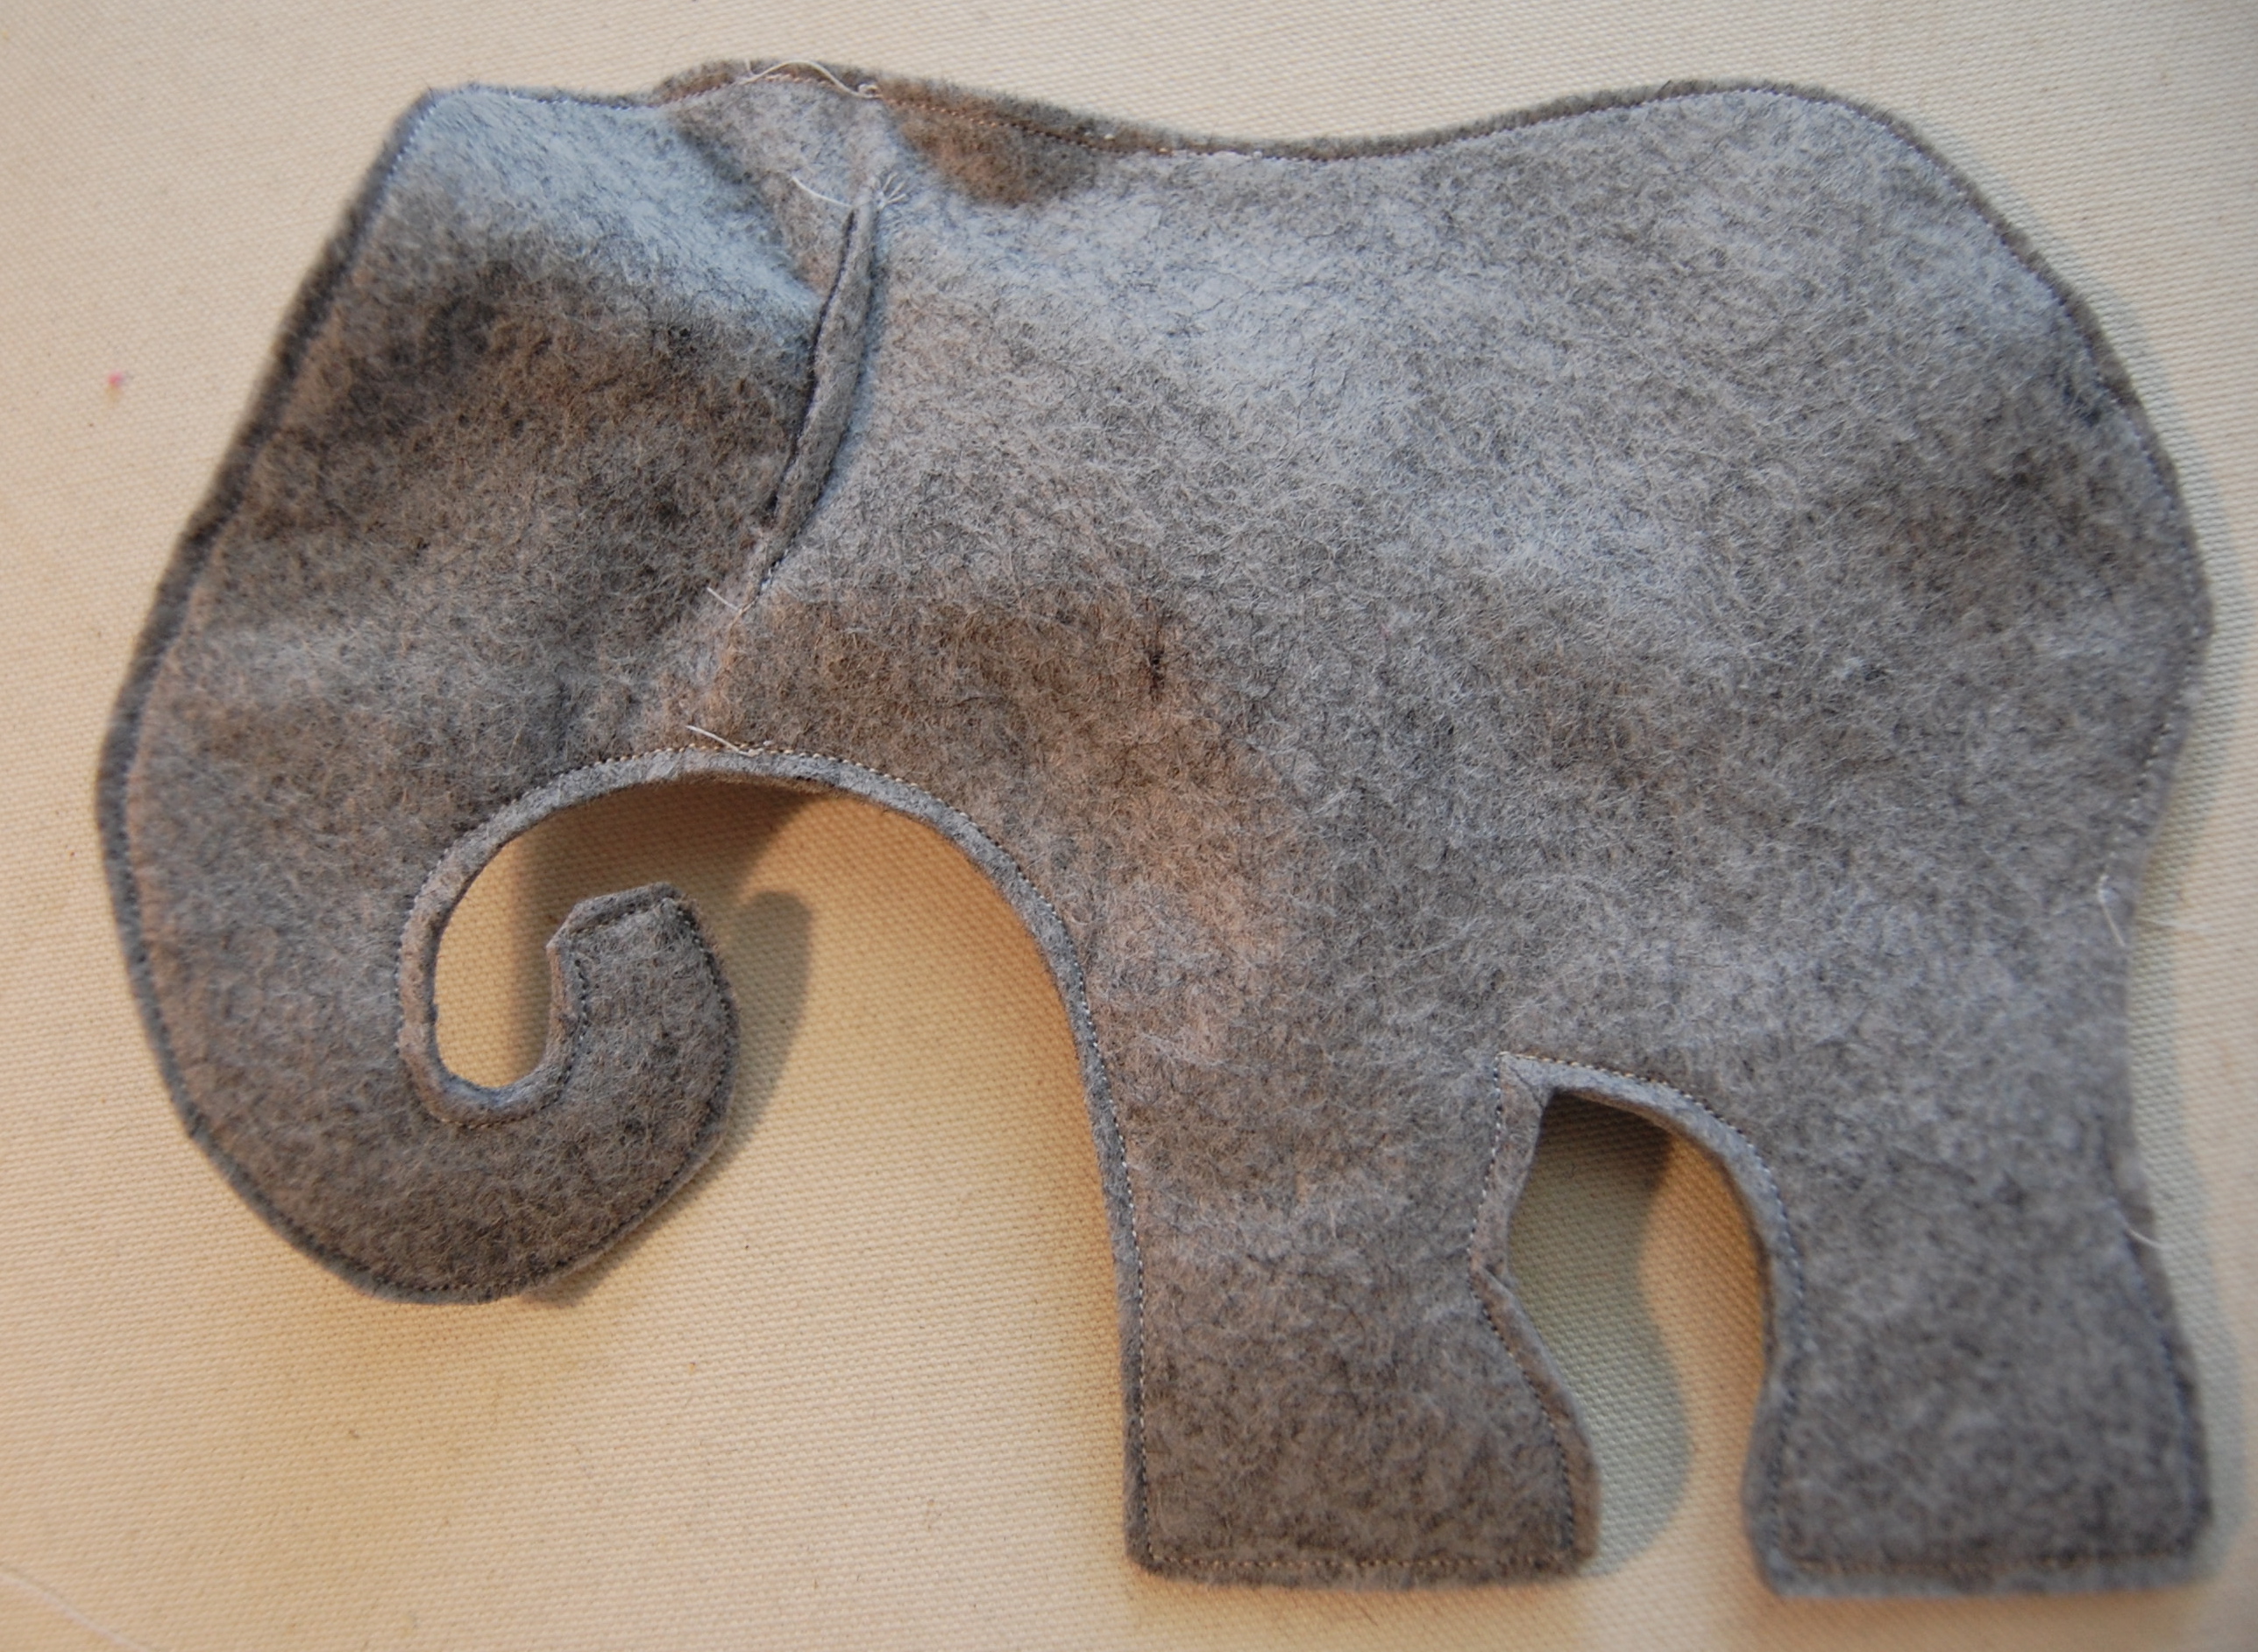
Now pin the body pieces together and stitch around, with the freezer paper still attached so that you can accurately stitch the outline of the pattern. Here it is all stitched up:
 Trim 1/8" from the stitching.

Clip the curves. Turn, stuff, close the opening with a neat ladder stitch.
If you need to add any other embelishments like embroidering a mouth or making a yarn mane, you can add them now. For the elephant, I am going to use some fabric glue to attach felt circles for eyes and little rounded triangle of pink felt for a mouth. You could also stitch these in place if you wanted to.

This is the kind of toy that even a child could make – in fact making simple softies with you children is a really fun way to spend an afternoon. If you decide to design a simple outline toy like this with your children, felt is a good fabric choice. Kids can handsew with a running stitch around the right sides of the outline because felt doesn't fray. A glue stick is an easy way to quickly add any embelishments before kids' patience runs out.
Or take one of your kid's drawings and use that as the outline! Make them a unique toy based on one of their original designs.
So, have you made a simple outline toy? Do you have any thoughts or ideas to add? Please add your voice to the discussion so that we can learn from you!
And if you have never drafted an original soft toy pattern, this is a good way to begin! It isn't too daunting and you will end up with something totally original. I think you'll enjoy the process.
It is not a terribly big leap to go from here to a truly three-dimensional softie with four-legs and a rounded head. What does it take? A head gusset and an underbody. Two big topics we can try to tackle soon!
Hi Abby, I love this series you’re doing! When I’m making soft toys (or finger puppets) I often google cartoons of the thing I want to make for the same reason you search for other people’s toys, to see the animal/person in their most simplified form. I find this great especially for political figures I’m making.
It’s always really interesting to see other people’s action plans, thanks again for a great series!
this is a great abby! i also tend to google images and cartoons of the animal i am looking at to get a simplified image. i also find reference books helpful as they tend to point out important features, such as in specific bird species.
i did one just like this last year with a giraffe for my five year old. she loved this project. she just did it with hand sewing, in felt, and worked on it a little bit at a time over a few weeks. she was so proud!
this is so beautiful… thanks so much for sharing this!!!
Looking at cartoons is a great idea! Cartoon images are already simplified, and usually exaggerated. Thank you!
Thanks for your tutorial series! Lovely elephant! I made a sock elephant and it was so fun figuring out how to make the head/trunk. I look forward to more posts!
You instill confidence in a softie-maker-wannabe! Thank you for this series. I liked your reference to coloring book simplicity – it’s fun to see how different people exaggerate or diminish features.
This is a terrific tutorial. I’m pretty skittish around my sewing machine, but I’m pretty sure I could raid my stash of fabric and find something interesting to make a softie with!
Give it a try! Its so satisfying to see a toy come together from your own idea! And it is not hard – I promise.
That was so much fun to read. I was thinking of starting out with an outline child just today (having looked through some of your recommended books), but I am exhausted after the elephant and babysitting grandson so will head to bed with your FABULOUS new book that Beth brought me today!!! Your new series is really over the top super. Thank you!
I really like making outline toys with kids (I teach beginning sewing classes every summer) and I’ve got a nifty little trick for keepiing the proportions right after they’re stuffed. I’ve found that if I add 1/4 inch seam allowance to the widest part of the toy, and a 1/2 inch seam allowance to the narrowest part of the toy – then use 1/4 inch seam allowance all the way around when I sew – it helps keep the finished proportions looking right. No more wobbly necks and too-skinny arms and legs. It’s a great shortcut that almost always works without going through a bunch of prototypes.
What a great tip, Wendi! Thank you so much. It means a lot coming from such an experienced teacher!
I am completely in love with this series you are doing. Thank you for doing this for free <3
I think thought that this post should read as #4 not #5 though right?
Ooops! Thank you! I fixed it.
This is a great step by step for people just starting out making plush! Thanks for the inspiration! The kids I am babysitting will love doing this kind of activity.
After about 15 Scrap Monsters my mom asked me to do an elephant for a friend. I wished I’d read the freezer paper page before I did mine.
I googled line drawings of Elephants because I knew I wanted something simplistic. After I cut out cardboard I cut it apart and added a new head taping it in place.
Thanks for all this info.
this is the right and easy way to learn how to make a good toy.thank you for this inspiration.
Thank you for this, I was looking all over for tips for soft toymaking and patternmaking. I will try this!
Whoopee! I can handle this step. I even took a drawing class when I was 47. And now I’ ready to learn gussets and go for the gold.