Editor's Note: This series of posts became a book!
Stuffed Animals: From Concept to Construction was published by Lark Crafts in 2013.
+++++
I love jointed soft toys because they have moving parts. Any place on a toy where two parts are making contact could have a joint. Hips, shoulders, elbows, knees, and claws are all places to create joints. Joints in a toy invite you to come over and play, make the toy move and let your imagination take hold. They add fun and complexity to a toy design so it is good to know how to make a variety of different kinds of joints.
We already looked at making basic button joints. Over time I will do posts on many other ways to create joints so that they are here, fully described, for us to reach to when we are designing new toy patterns.

I first learned about gusseted button joints from Susanna Oroyan's book, Anatomy of a Doll (look out in a few weeks for an exiciting giveaway here from Susanna's publisher, by the way!). I was making a crab and I wanted to attach the claws so that they would be able to move back and forth. The gusseted button joint was the perfect solution.

A gusseted button joint is like two flaps at the end of one part of a limb that wrap around the beginning of another part of the limb and allow for movement between the two parts.
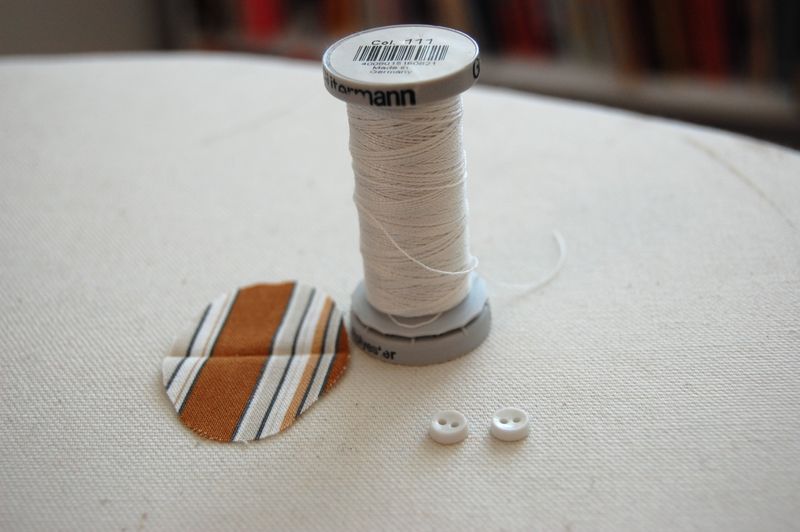
To make one, you'll need two buttons, some extra-strong thread, and a scrap of fabric.
I am going to sew the gusseted button joint that connects Humpty Dumpty's upper arm to his lower arm. The joint will be part of Humpty's upper arm.
To begin, I simply sew up Humpty's lower arm.
Now I can focus on the upper arm and creating the gusset.
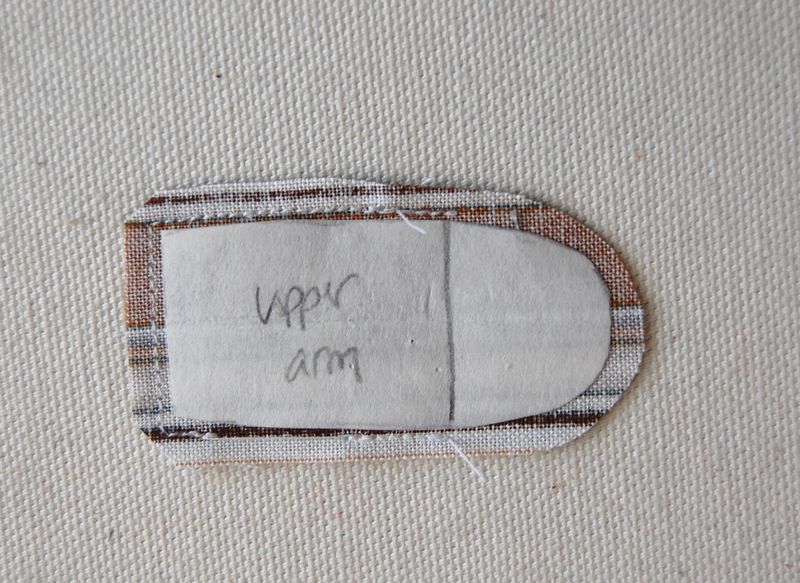
I will need to draw an additional pattern piece that will be the gusset. I use the end of the upper arm as a guide. I draw a line across the top where I want the gusset to begin. This creates half an oval. My pattern piece will be this half oval and it's mirror image – resulting in a whole oval.
I cut the oval from fabric, folded it wrong sides together, and pressed a crease in it.
Now I place it, right sides together, against the end of Humpty's upper arm.
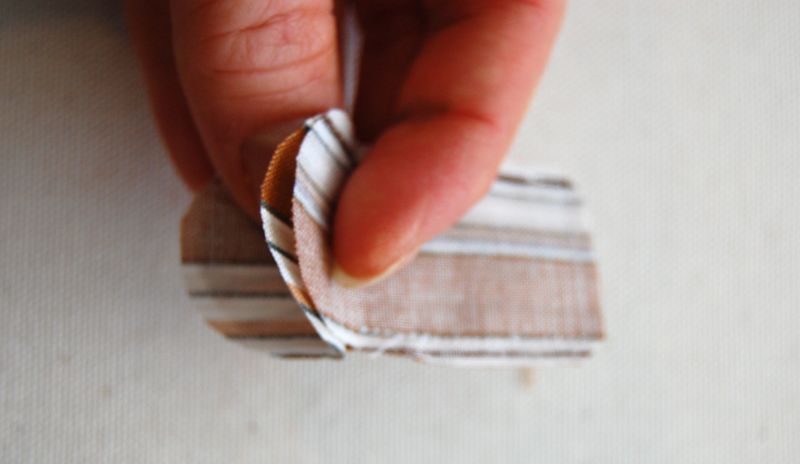
Sew the arm together, sewing each side to the oval.

I turn the upper arm and stuff it up to the gusset, leaving the area with the oval unstuffed. I now have two dog ear-like flaps that will encase the top of Humpty's lower arm.
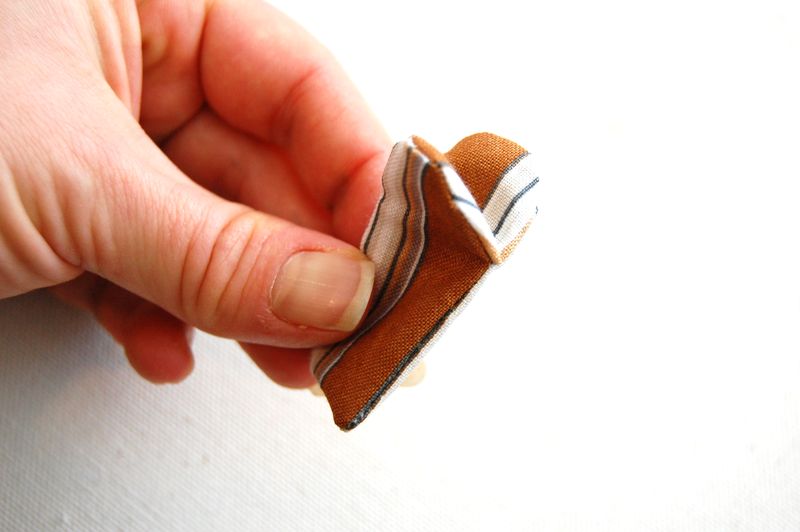
You can push a small amount of stuffing into each flap to lightly pad it if you want to, or just leave it empty.
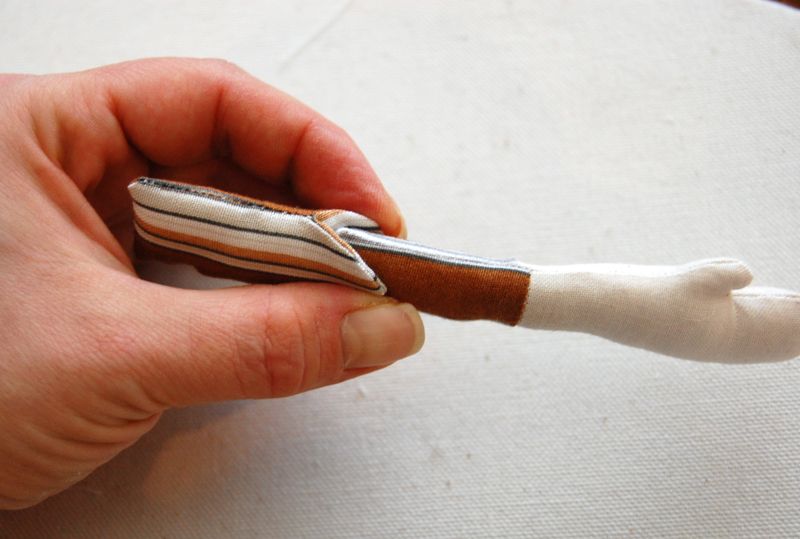
Insert Humpty's lower arm between the flaps. Sew a button on top, pushing the needle down through the flap, the upper arm, the other flap and a second button.
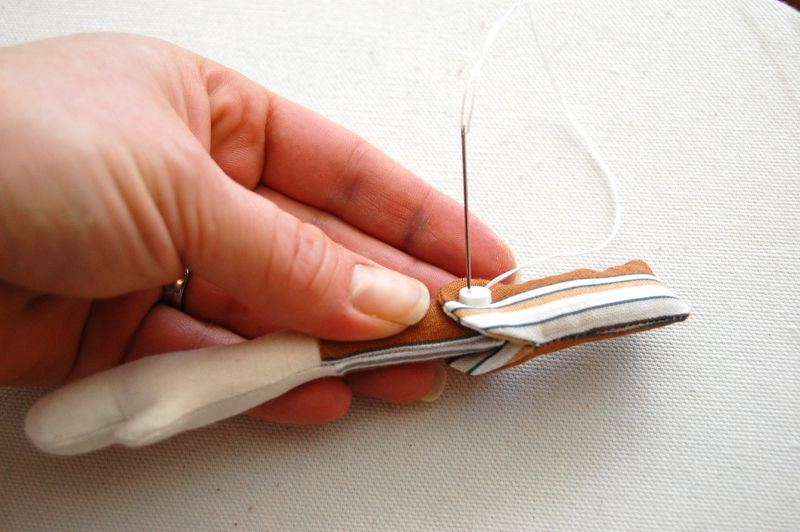
Go back and forth a few times and the tie off the thread.
Because of the joint, Humpty can move his arm at the elbow. He can wave (a good thing for an egg that is about to fall off a wall)!
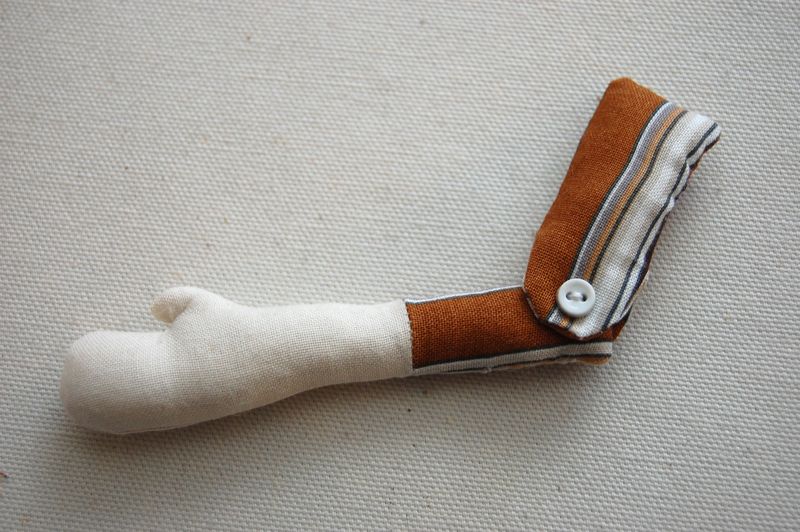
**This Humpty Dumpty was commissioned by a props master for a major motion picture that is just about to begin filming in Orlando. How cool is that!**
Have you ever created a gusseted button joint for a toy or doll? We would love a link so that we can see more examples and get inspired. Do you have any suggestions for ways to use this joint? Or tips for creating gusseted button joints? Please leave a comment and add to the discussion! Thank you, everyone!



I have never tried this technique but I can see all sorts of uses! Actually, I think this would be great for making a “mechanical” toy. I had this idea a while ago for making a (very simple) soft version of a bulldozer or tractor and I can imagine you could use this joint to make the bucket lift and move.
Now I want to make a doll with all sorts of moving joints. Thanks again for this wonderful series!
Ahhhhhhh! Genius! Thank you!
Hey Abigail, thanks for the series on soft toy design.It’s certainly been alot of work to put it together, so think you very much.
I have just discovered it and gotten so much out of it.
Gussets being my biggest bugbear, I am going to give it a whirl and see what I can come up with.
Claire :}
Abby, it’s such a treat to watch you work!
Awesome, Gabrielle. Such a cool idea! Check out Meg’s soft diggers with button joints. Here is a link: http://www.elsiemarley.com/diggers.html
I’ve wanted to do a Tin Man for awhile, but was stuck at how to do the joints, because I wanted him to have some movement. Thanks for the great tutorial.
~as you suggest, “Coooool”
Thank you for sharing your know-how through these wonderful tutorials.
I wonder if for this technique to work with larger buttons, when sewing the buttons one has to make sure the threads go back and forth through a single hole in the layers of fabric… otherwise there’s no pivot point? Like if you staple two strips of paper they will not pivot, but if you stick a pin through they will? Or is it a matter of not pulling the threads too tight so they can twist? I wonder…
Cristina
Brain waves! I was just reading about this in an old book and wanting to try it! You demonstrate it so well! Thanks….I love it.
xo,
Sena
You can hid the button on the inside of a joint. I remember Mimi Kirchner writing about this subject on her blog. I have used it ever since! Thank you for your nice series on soft toy making!
Yes! I am planning a post about hiding the button inside the joint. Such a cool way to do it!
Hello Abby, Thank you so much for this series! I just discovered it a few days ago and have been doing a marathon run through all of your lessons. Great info!
Hi
I’m loving your blog, it has really inspired me! I’d love to make your Humpty Dumpty. Is the pattern available to download or buy anywhere?
Kris, The pattern was in the January 2010 issue of Australian Homespun magazine. Don’t know if you can find that, though. Sorry!!
Hi Abby, I love your Humpty Dumpty joints.
I have also been experimenting with joints this week for my doll. Using the Susan Oroyan books as a reference and starting point. I have also been working on making her more three dimensional. I tried button joints and am thinking to try cotter pin joints withan elastic join.
Link to my efforts is here: http://a-small-obsession.blogspot.com/
You are such an inspiration! Thank you!
Hi Lisa,
That's awesome! Your doll work is so lovely and precise. I really admire your attention to detail. I'll be interested to hear how you like the new jointing techniques you're trying!
Just added a link from my blog to this for anyone else who wants a clear description and pictures on button links.
Found your tutorial by Google search for “cloth art doll knee joint tutorial.” Wonderful and so simple. I’m going to try it today on a doll that I’m working on. Thank you so very much for sharing.