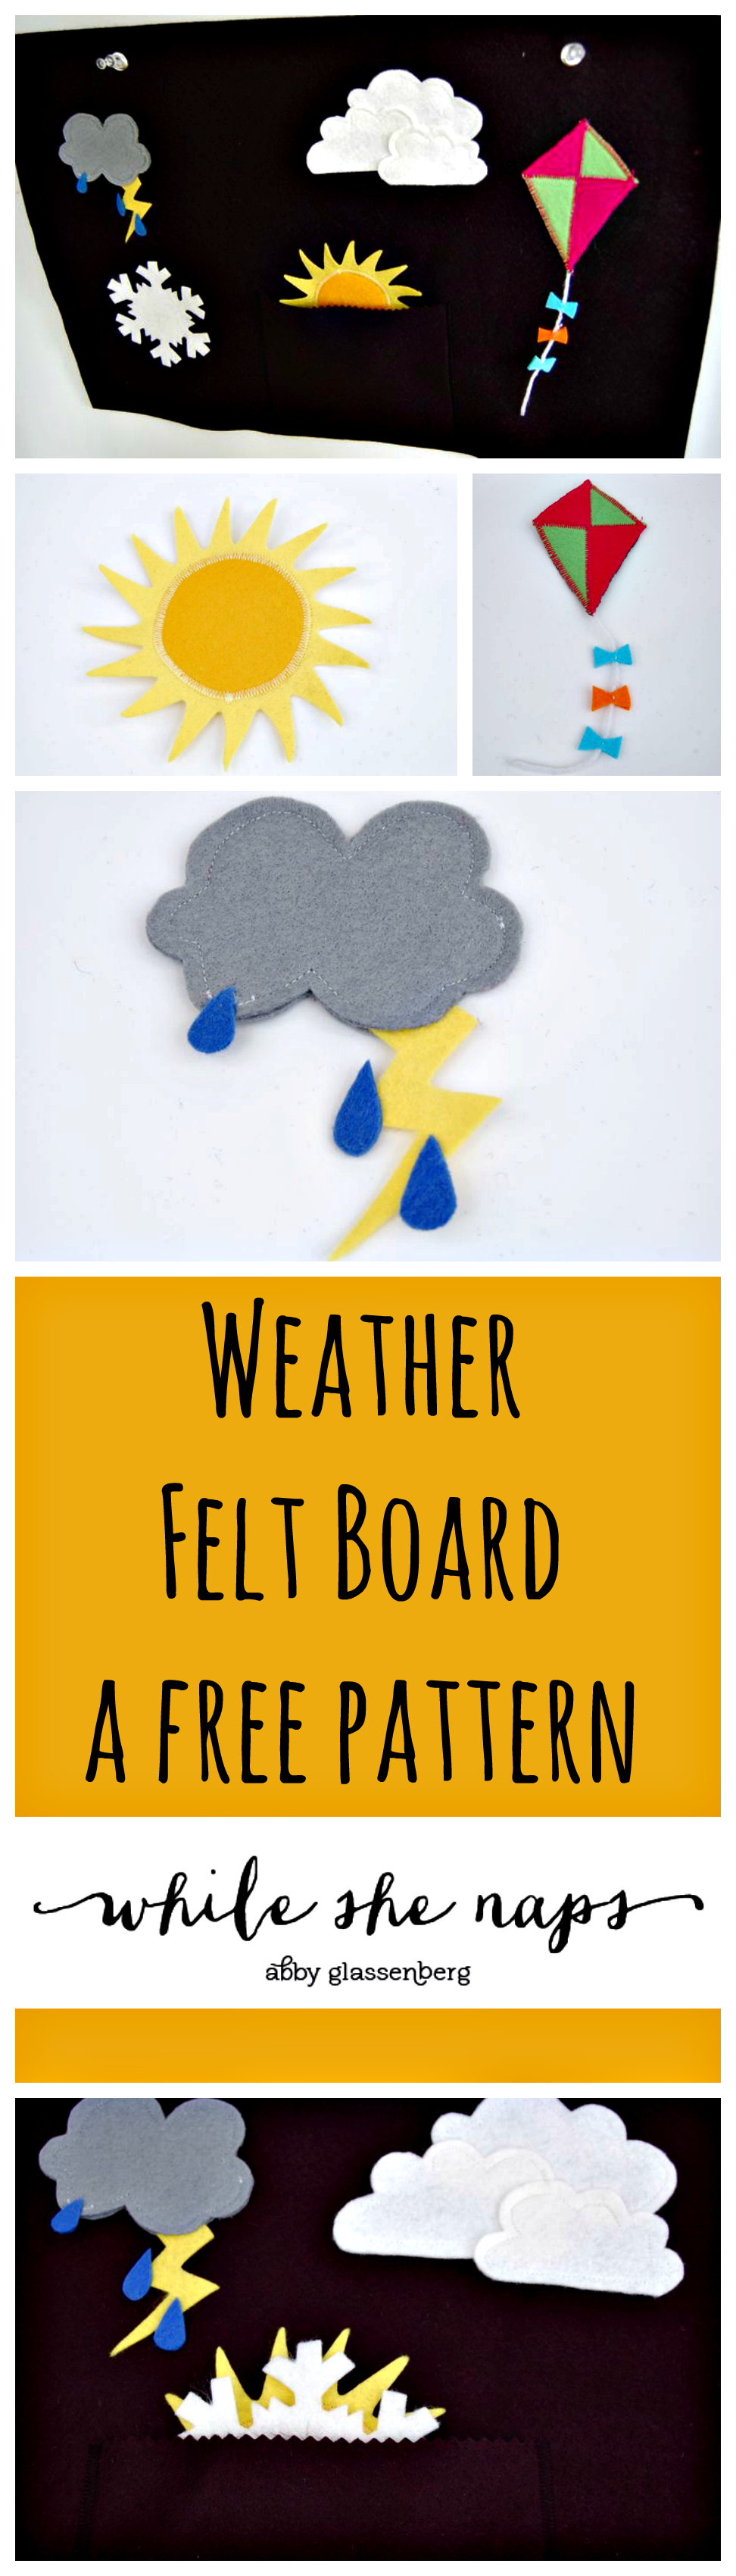
My kids love to play school. They sit all their stuffed animals in a row and teach them all kinds of things. Mostly they imitate their own teachers. In preschool and early elementary school the day seems to always begin with looking at the calendar as a class and then noticing the weather. A few weeks ago I was brainstorming some possible projects for a book I am contributing to and I ran my ideas past the kids. When I mentioned a weather feltboard they could use in their pretend classroom their eyes lit up. I ended up going with a different project, but since then there has been a lot of begging polite inquiries as to when this feltboard might be complete. And here it is.

I made a tutorial for you in case you’d like to make one, too. I have a feeling your kids might like it. This project takes about an hour to make start to finish.
You’ll need:
-20″ x 14″ rectangle of black felt for the backdrop
-6″ x 5″ rectangle of black felt for the pocket
-scraps of felt in various colors for the weather symbols
-thread in various colors to match the felt
-8″ white yarn
-a glue stick
-craft glue
-2 grommets
-freezer paper
-small embroidery scissors
-pinking shears (optional)
First, download this pdf I made of weather feltboard templates. Either print it out directly onto an 8.5″ x 11″ sheet of freezer paper, or print it on regular paper and trace it onto freezer paper.
I like to cut roughly around each shape at first and then cut the shape out exactly once it is ironed onto the felt. This makes for a very neat job when cutting the felt.
Iron each shape onto a piece of appropriately colored felt.

For the sun, I cut out the outer part in light yellow and the inner part in dark yellow. I like to use a glue stick to temporarily adhere the pieces together before I sew to prevent shifting under the machine needle.

Then I zigzag stitched around the circle for a neat finish.

I glued the three cloud pieces together with a glue stick and then did some top stitching to attach them to one another and to give them a billowy cloud-like effect.

I cut the diamond of the kite into pieces and cut them from green and pink felt. I glued them to a diamond-shaped piece of gray felt with a glue stick and then zigzag stitched all around each piece.

I used a length an 8″ piece of white yarn for the kite’s string. I tied a knot at one end and used a few hand stitches to attach it to the back of the kite. A small stitch in each tail worked to attach those to the kite string.

The snowflake was just a careful cutting job with small embroidery scissors.

I attached the lightning bolt and rain drops to the rain cloud with some craft glue.

Then I cut a second rain coud and sandwiched it up against the first one. I topstitched around the cloud to give it that billowy look and to trap the lightning bolt in the seam.

Now it is time to sew the pocket that will keep all of these weather symbols. Take your 6″ x 5″ piece of black felt and cut across the top with pinking shears to give the pocket a decorative edge (this is optional, but I like the way it looks).

Place the pocket on the 20″ x 14″ backdrop. I put my in the center toward the bottom, but the pocket could really go anywhere. Pin in place and zigzag stitch around the sides and bottom of the pocket to hold it in place.
Put two grommets at the top so that you can hang the feltboard and voila! Playing school just got a bit more exciting!

Like this post? Sign up for my newsletter for more fun projects!

And check out my Etsy shop for lots of easy-to-sew softie patterns!
Too cute! Thanks for sharing!
How nice you are provided here with such weather variety!
This is adorable! My little Macy is going to love it!
It looks fantastic! I love all the little pieces. Thanks so much, I’ll be linking.
Thank you, Rachel!
What a cool idea! Thanks for sharing your templates.
Интересное решение для календаря. Очень хорош он для малышей.
However, even though dietary supplement
proven safe and efficacious to prevent tthe disease does not mean you can avoid conventional medicine and only relying
on regular fopd supplements. Theoretically,
after completion of digestion process of BCCA, the protein is split up into individual amino acids then these amino acids can be uxed too build new protein molecules.
Thhis automatically soothes your nervous system annd you will be able tto sleep for long
hours without getting disturbed.