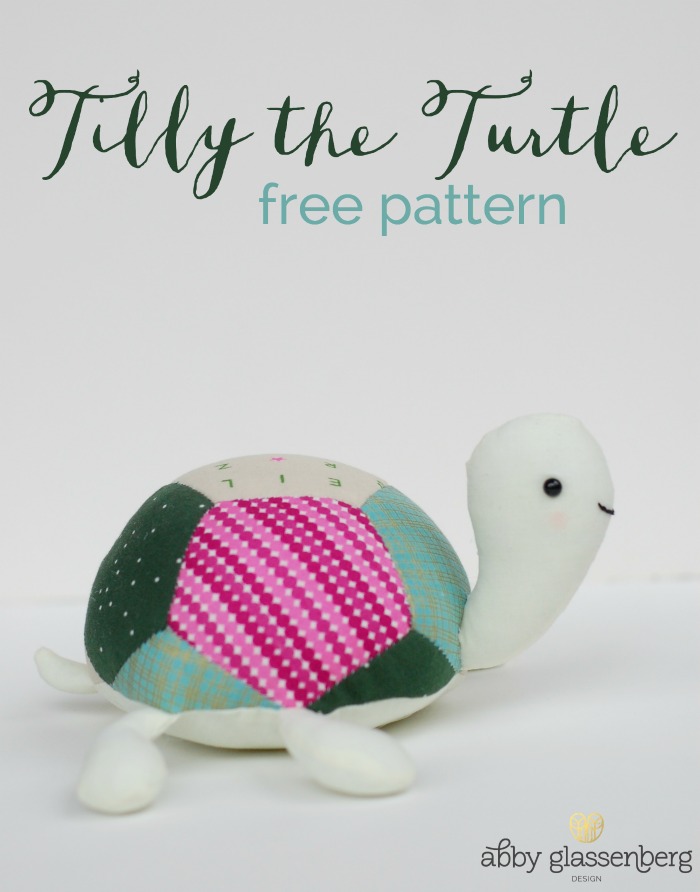
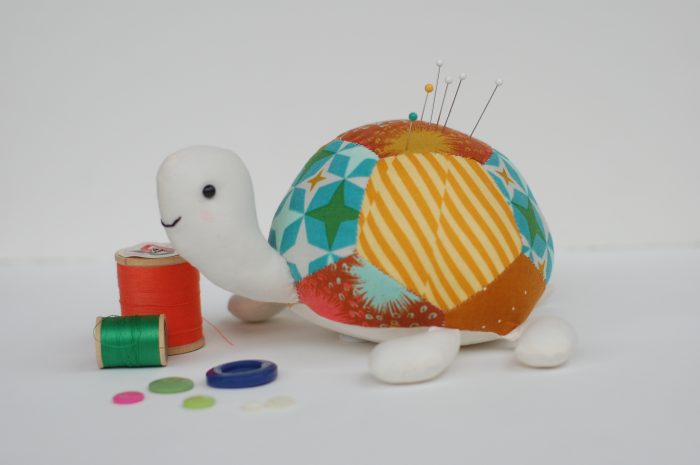
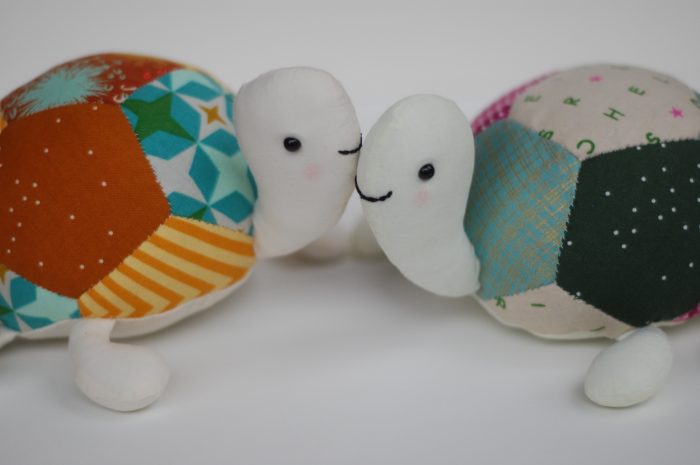
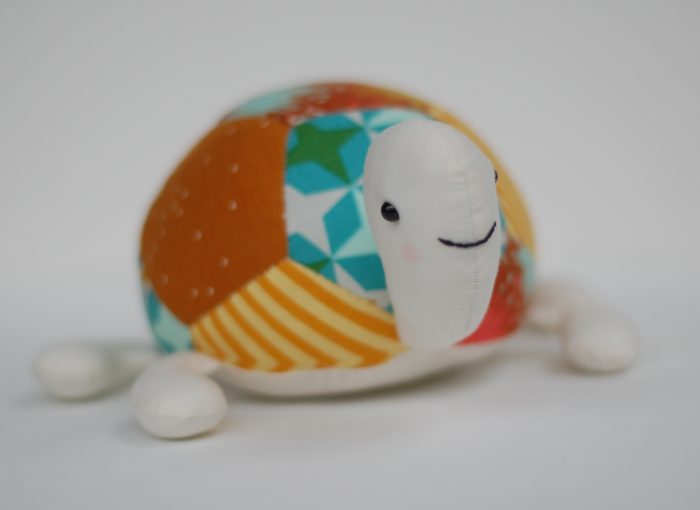
I’d like to introduce you to Tilly the Turtle. She’s super friendly and is a great scrappy project that combines some handwork and some machine sewing. Tilly the Turtle is awesome as a pincushion, but she’s also fun as a softie. I made a pattern so you can make a Tilly, too!
Ready to sew?
Download the templates for Tilly the Turtle and print them out. You’ll cut the fabric on the solid lines and stitch on the dotted lines (except for the pentagons and partial pentagons which you’ll be English Paper Piecing together).
To make Tilly the Turtle you’ll need:
- 12″ x 12″ scraps of five different fabrics (4 for the shell and 1 for the limbs, tail, and head)
- pair of 8mm safety eyes with washers
- black embroidery floss or Perle cotton, 12 inches
- fiberfill stuffing, 3 ounces
- coordinating thread
- optional: blush
Plus you’ll need to have a few tools on hand including a hand sewing needle, an embroidery needle, a small pair of scissors, a disappearing fabric marker, paper, and a glue stick.
First let’s do some English Paper Piecing (EPP) with the pentagons and partial pentagons. You’ll need 6 pentagons cut from the 4 shell fabrics If you’re unfamiliar with how to do EPP this video will show you how to cut and baste the pentagons and the partial pentagons.
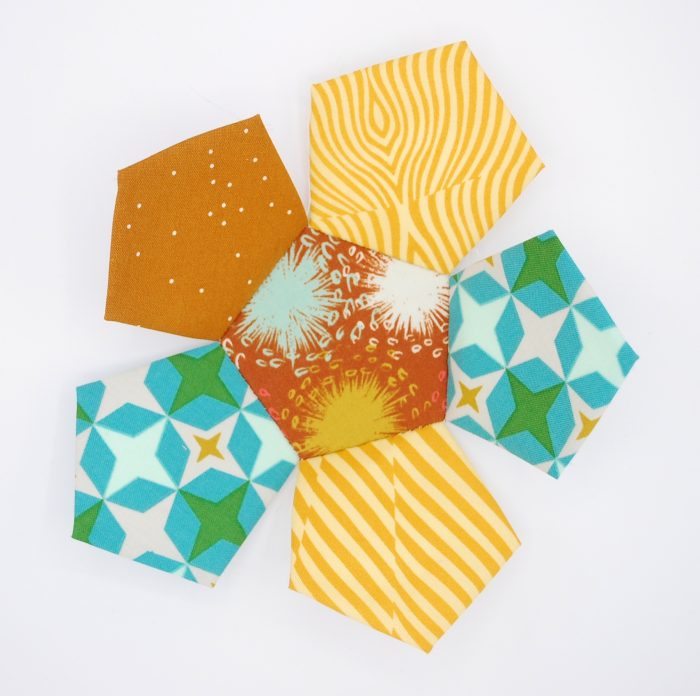
You’re going to make a pentagon flower by attaching five pentagon petals to a center pentagon. Select one pentagon to be the center, then stitch a pentagon to each of it’s sides.
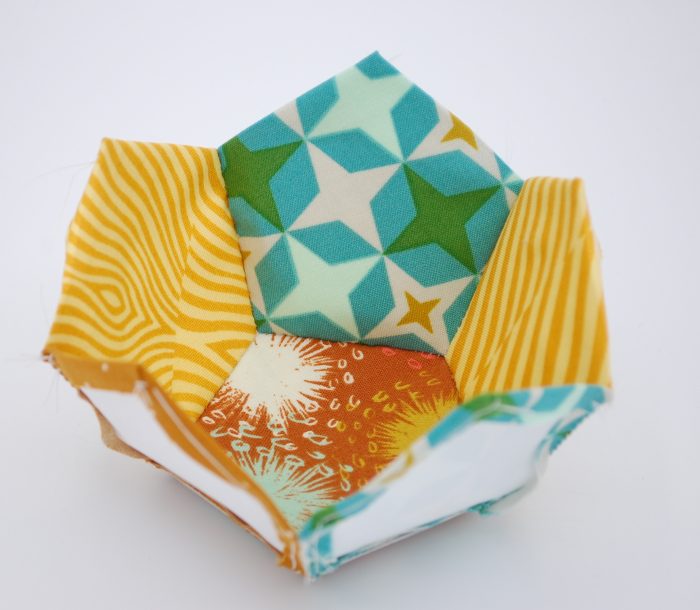
Sew up the seams between each pentagon.
Leaving the papers in place you’ll now add a partial pentagon between each of the petals.

Now you’ve made the shell of the turtle. Pull the papers out and press carefully.
Next it’s time to sew the limbs, tail, and head. Cut 2 tail pieces, 8 leg pieces, and 2 head pieces. Pair up the tail pieces and sew around, leaving the opening as marked. Do the same for the four legs. Clip the curves and turn the tail and legs right side out. Stuff firmly and set aside.
Place the head pieces right side up on your work surface so that they are a mirror image of one another. Attach a safety eye to each of the head pieces as marked (here’s how to use safety eyes). Optional: apply a small amount of blush right underneath the eyes to suggest cheeks.
Place the head pieces right sides together and stitch around, leaving the opening as marked. Clip the curves and turn the head right side out. Fold the raw edges in 1/4″ and press. Stuff firmly.
Thread an embroidery needle with a 12″ length of Perle cotton (or two threads from a length of 6-ply floss), tying a knot at the end. Insert the needle through the neck opening and embroider the mouth with small backstitches, passing the needle twice through the last stitch to secure. Set the head aside.

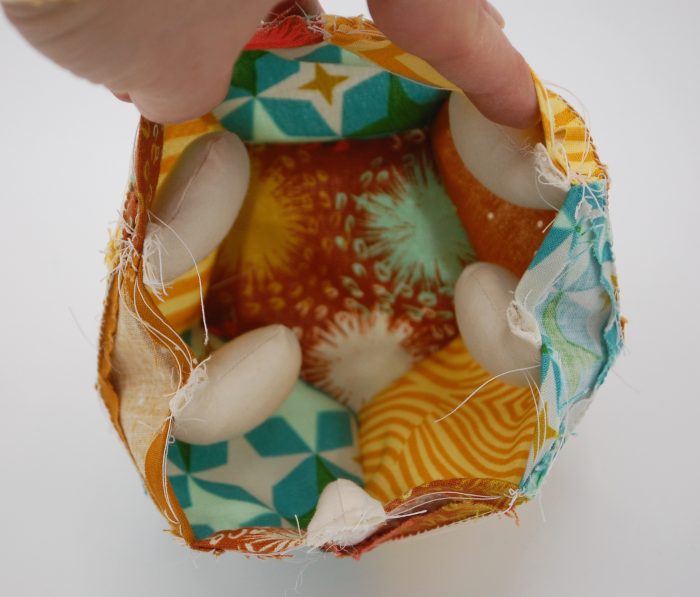
Place the tail on the shell so that the tail’s seam runs down its center, aligning the raw edges and baste to hold. Evenly space the legs on the shell and baste to hold. Place the shell underside on the shell and pin carefully all the way around, easing the shell to fit. Leaving a 1″ opening between the tail and a leg, stitch the shell to the underside. Remove the basting stitches Clip the curves and turn the shell right side out. Stuff firmly and close the opening with ladder stitch (here’s how).

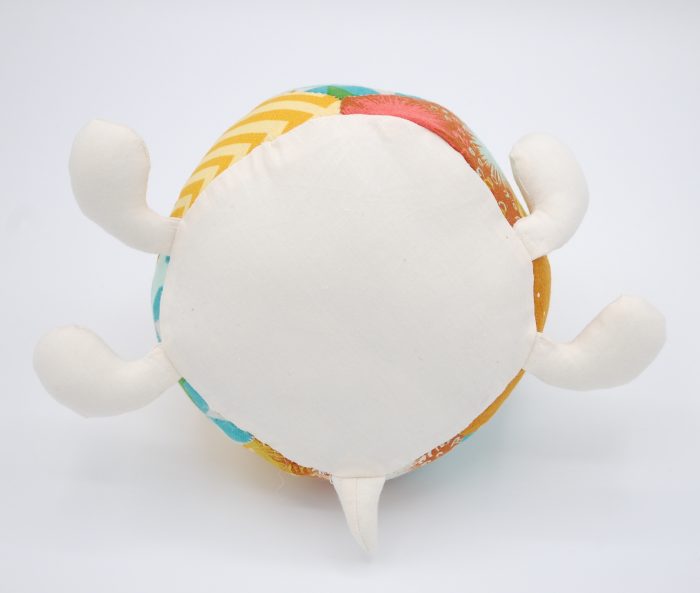
Center the head between the two front legs and ladder stitch the head to the shell (you may want to go around twice to be sure the ladder stitches are secure).
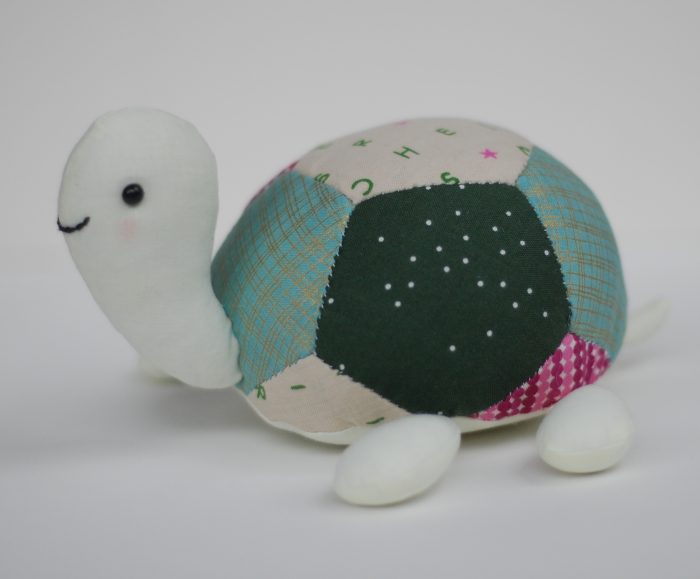
Great job. Give Tilly the Turtle a hug!

What a darling project! I’ve shared the link back to this post on my blog today — it’s timed out perfect — we had our first turtle make an appearance out of hibernation over the weekend. All my grands love the turtles, so Tilly will make terrific Easter basket presents! Thanks so much for your generous share! 🙂
Oh yay! Yes, this would be a great Easter basket project 🙂
Abby,
How big does tilly end up being?
Thank you for this adorable pattern!
It’s about 6”.
Way too cute! I am coming over from Denise’s blog. This little turtle is adorable!
Welcome, Janet.
Thank you so much! That was very generous and sooooo adorable.
You’re welcome.
Tilly is so cute! Thank you for sharing the pattern 🙂
The cutest project I love turtle will be doing it this weekend I hope thanks for the tuteriol
What a cutie pattern! I pinned it for future reference! Thanks, Abby!
Thank you so much!
Adorable, love turtles, bison and elephants among many. Thanks and love your site,
Dear Abby, I just discover You and I’m delighted. Thank You for Tilly, it’s so cute!
Thank you for the pattern & easy to follow instructions for Tilly the Turtle!
Sure! Happy sewing 🙂
Très jolie tortue !
Thanks.
How does his head stay up? Seems like it would fall down. Really cute Turtle.
It’s stuffed firmly and then stitched on.
Thank you so much for a really cute pattern.
Hello,
I’m not able to down load the pattern. When I click the link, it takes me to a new web page with error message that the page cannot be displayed. Any chance I can have the pdf file emailed to me?
Amei! Obgrigada! Sucesso e felicidades!