Editor's Note: This series of posts became a book!
Stuffed Animals: From Concept to Construction was published by Lark Crafts in 2013.
+++++
Head gussets have got to be one of the biggest challenges in soft toy design.
You will remember from the post on underbody gussets that a gusset is a piece of fabric inserted into a seam to add breadth.
What make designing a head gusset so difficult? The head gusset is what makes the animal's head round and herein lies the challenge. In order to design a head gusset you have to be able to fully imagine the two-dimensional animal you have sketched on your paper in three-dimensions. Where will the head need to taper and where will it need to widen? And by how much?
Like anything, practice certainly helps when it comes to the more challenging parts of design work. The more patterns you design and edit and redesign the more you learn to envision how a head gusset should be shaped. But there are some good rules of thumb and some solid methods that will help along the way.
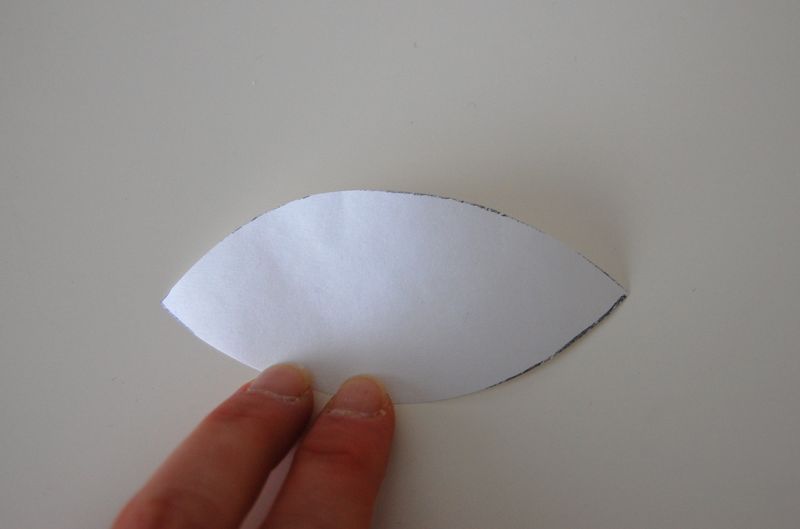
The very simplest of head gussets is a pointed oval shape. This head gusset will give you a rounded head without any contours. If you make it very wide, the head will be wider at the top than the bottom, giving the toy a cuddly, baby animal-like feel. If you make it very narrow the head will still be nearly two-dimensional. A happy medium in between will give you a nice, rounded head.
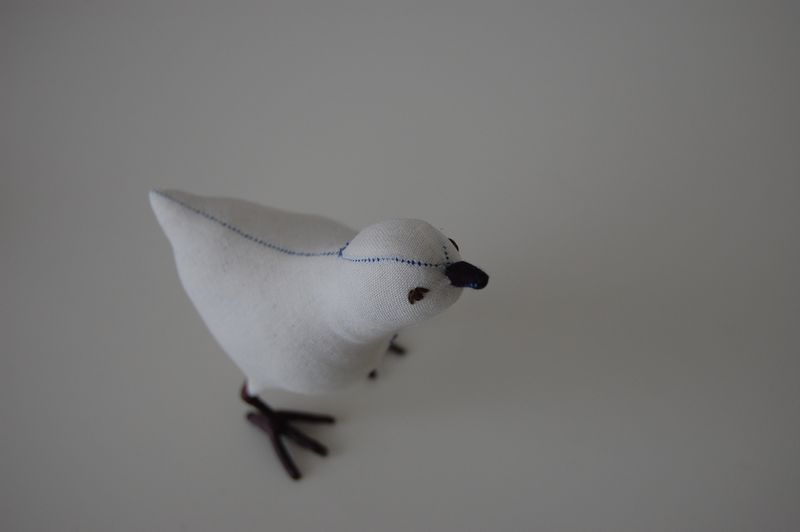
Almost all of my birds have this sort of head gusset. If you have never designed a toy with a head gusset, a pointed oval is a good place to start.
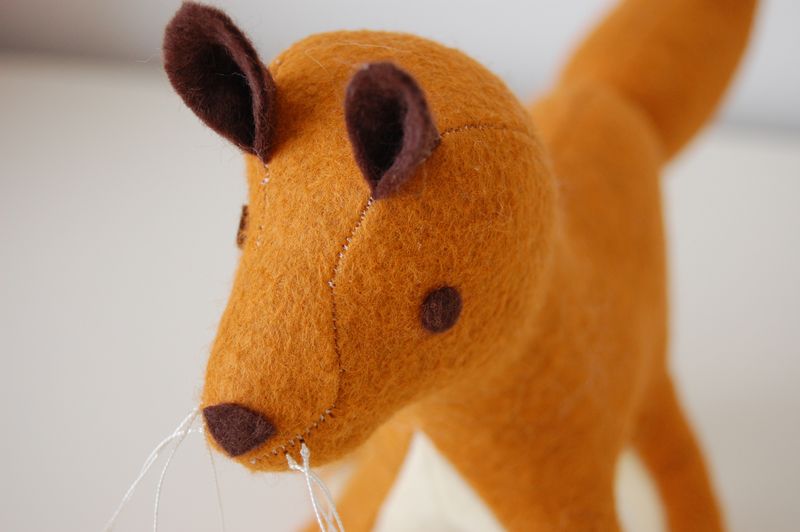
A more nuanced head gusset will give you an animal with a more contoured face and head. You can use the gusset to accentuate and shape a muzzle, for example. These are trickier to draw and I am still learning to draw them well. Come learn along with me! I am going to share with you the method that I am currently working with. I originally learned this method from Good Design in Soft Toys by Rudi de Sarigny, but I've adapted it over time so that it works better for me.
First I cut a strip of paper that will be the length and width of the finished gusset. Then, I will draw the gusset on this strip so that I can be sure that it will be the correct dimensions. Here is how I get the length and width of the strip.
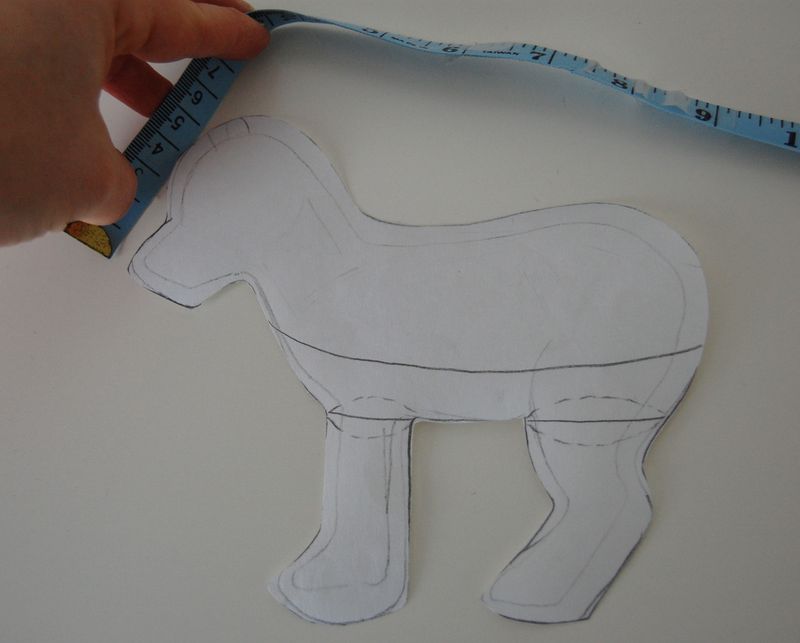
To get the length, I measure the distance from where I want the gusset to begin to where I want it to end. I usually start at the nose and end at the nape of the neck.
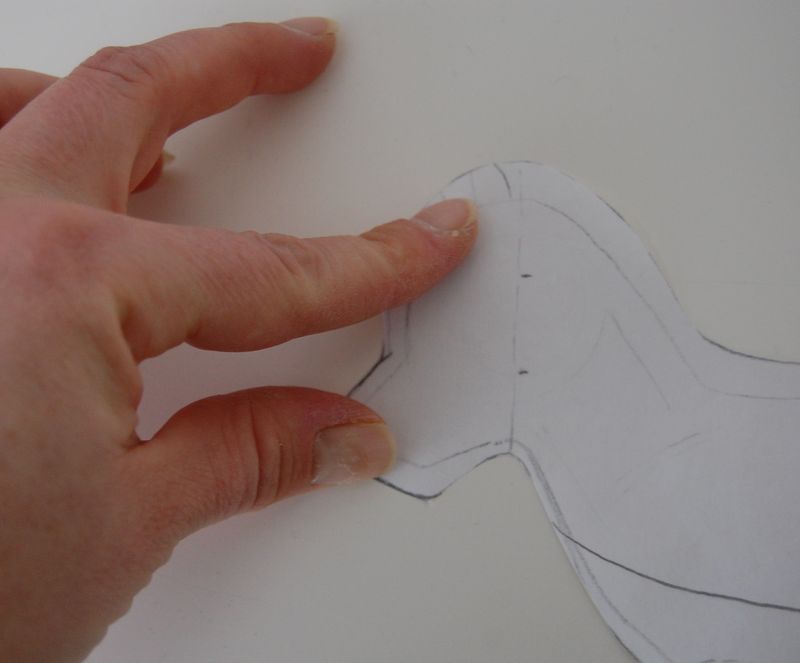
To get the width, I look at the side body of the animal. Starting at the top of the head, I measure 2/3 of the way down to the bottom of the head. This is the width.
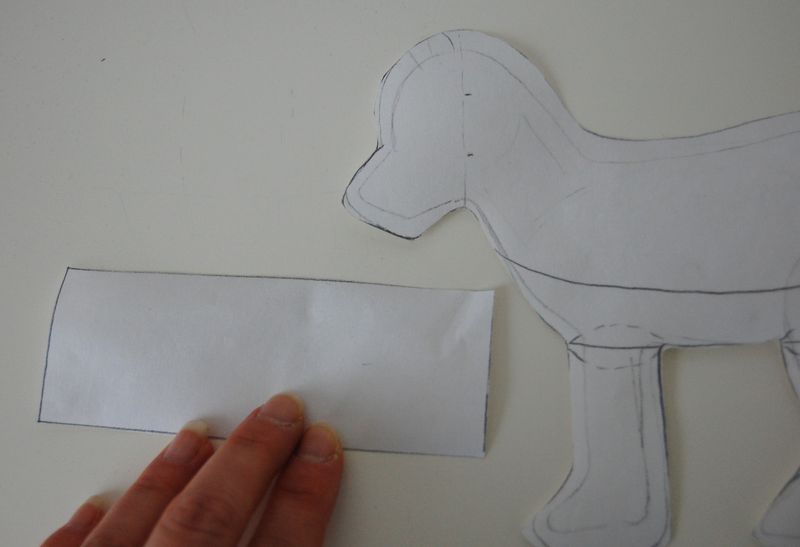
Now I have a strip of freezer paper in the proper dimensions.
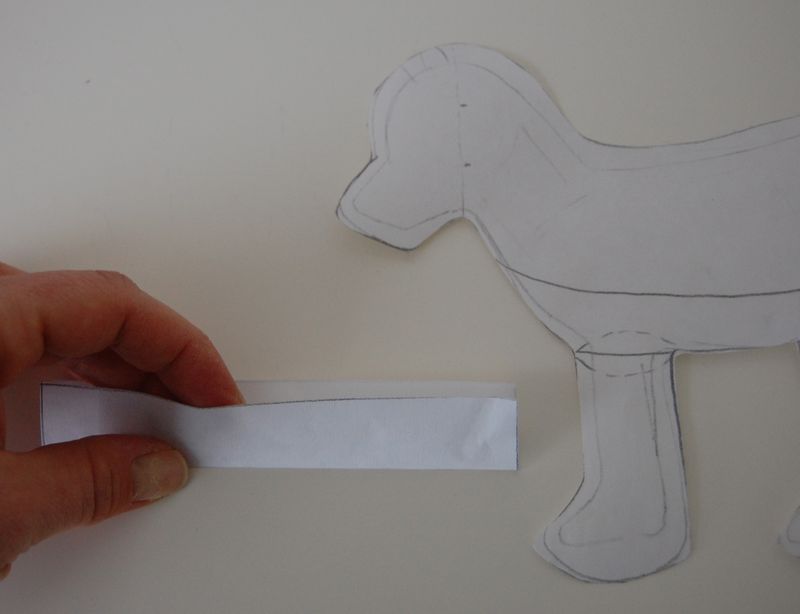
I fold it in half the long way so that the finished gusset will be symmetrical. I place it on my desk with the fold toward me.
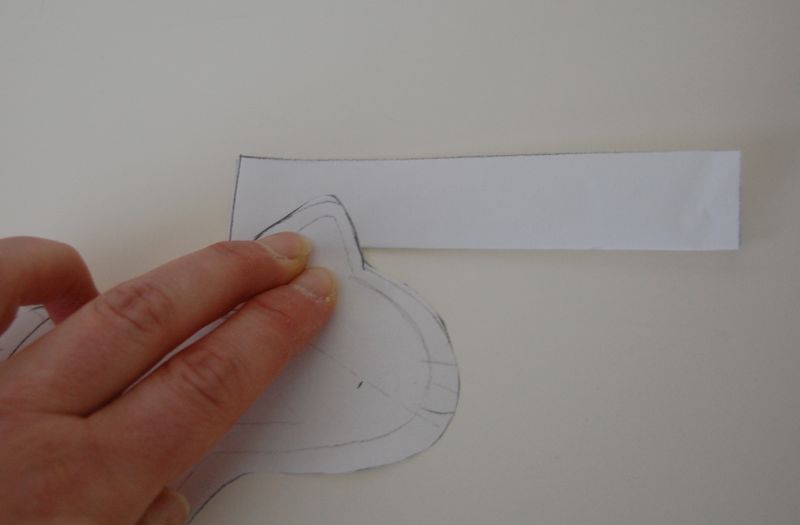
I place the side body on the strip and trace from then nose to the top of the head.
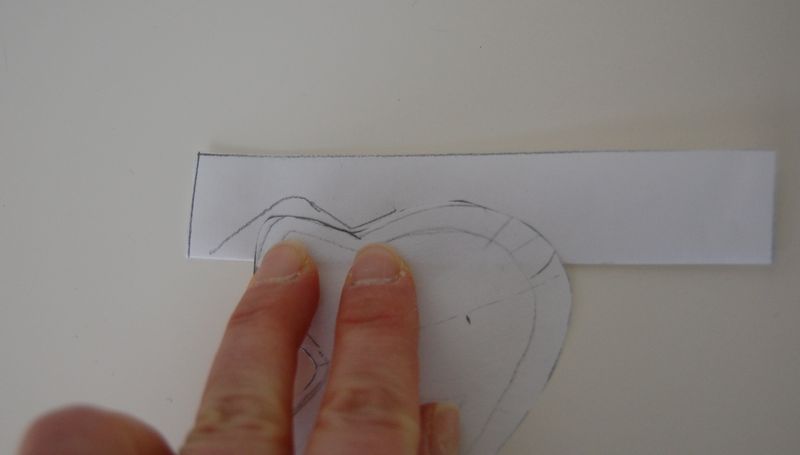
Move the body over and keep tracing.
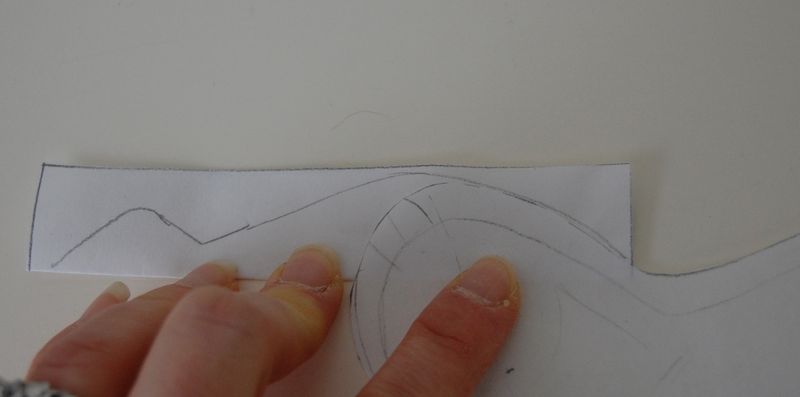
Here comes the part I have to just imagine. If I think the head should taper a bit, I make that part of the gusset narrower. If I think it should widen, I make it wider. I keep tracing around the muzzle until I reach the end of the strip, being sure to use the whole length of the strip and tapering it down at the end.
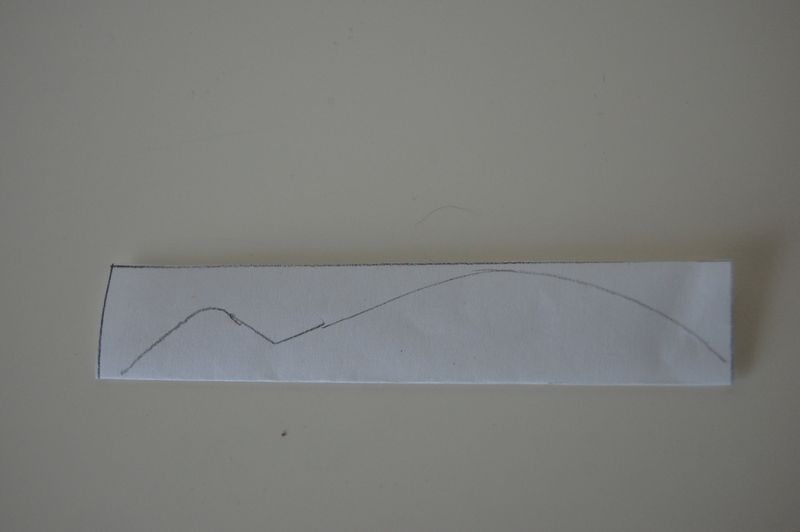
Cut it out. Here is my head gusset.
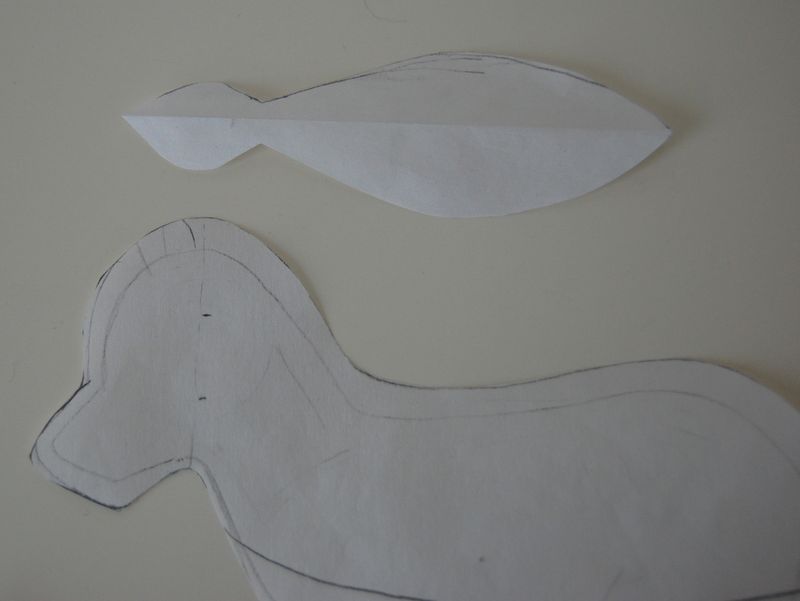
Is it perfect? Maybe, but probably not. The first time you make a newly designed pattern you need to keep in mind that it will probably require some editing. Use some cheaper fabric, like muslin. But stuff it. You need to take the time to stuff your prototype in order to really see where the edits need to be. Once you see the bulges and the tapers, you can trim your gusset, or retrace and widen it, as needed. At this point I always need to remind myself that I have not just "wasted" a few hours making something that didn't work. In fact, this time investment was totally worth it because the newly edited pattern could very well be one that I make dozens of times and sell really successfully. It is worth it. Keep trying!
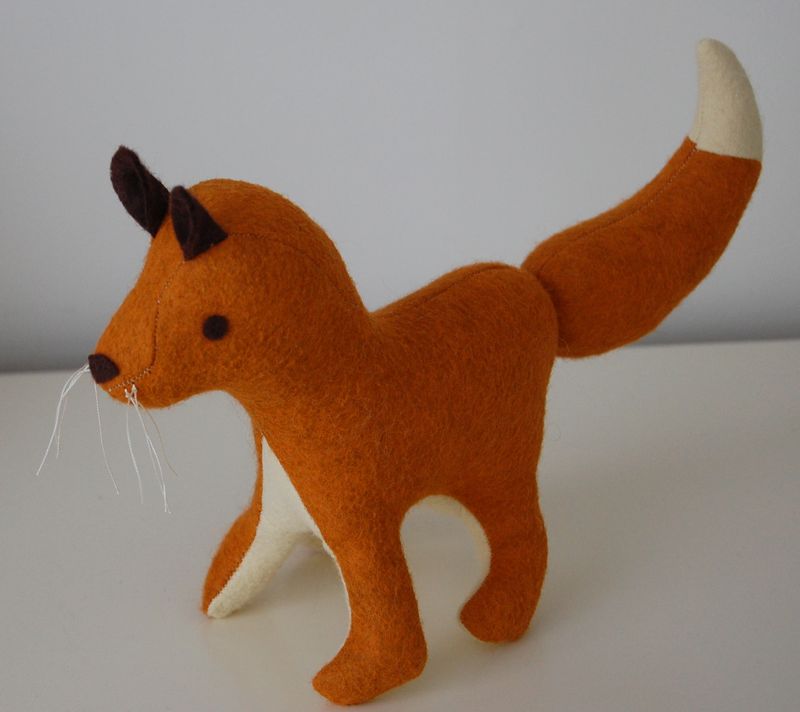
That is my method for drafting a head gusset. I want to know yours. Do you design toys with head gussets? How do you go about it? Please add your thoughts and idea in the comments. And if you haven't tried a pattern with a head gusset yet, jump in! Add a third-dimension to your softie. It will really make your ideas come to life.
Beautiful!
BTW, I’m still having trouble with the underbody gusset. I posted a comment on that thread, could you take a look? I’m desperate!
Awesome, I was imagining a similar process but was stumped on the tappering. You’ve given me something to think on now.
Abby, this is fantastic. I work almost exactly the same way.
One thing I do is number each attempt, as I sometimes have to stop and revisit things much later.
And you are right about it not being a waste of time, somtimes a gusset won’t work but it will give you an idea for a whole new animal or toy….
I’m still working on gussets and getting better each time. I totally agree that it is worth it to edit your work!
My method is much less scientific…I tend to work by feel. Most of the time, I just sort of know what shape the gusset should be. Then I cut a piece of fabric in that shape but bigger than I think I’ll need it.
When I have my head pieces lined up right sides together, I fold one piece back as wide as I want the gusset to be on that side. Then I pin the gusset in place, not minding the extra fabric off the edge. After I sew it, I trim the edges.
I guess it’s kind of like putting a top crust on a pie and trimming it off later.
It’s sort of difficult to explain just with words, but hopefully you get the idea. I think the most challenging part of head gussets isn’t designing the shape and size, but actually pinning it in place and sewing it on! I hope you’ll cover that subject soon.
As always, thanks for the information!
P.S. How funny I just finished a fox today! He has a long thin muzzle and so a very different head gusset than your fox’s. And I used your method of cutting holes in places to insert ears/arms/legs. I had hesitations in the past with this (cut holes in your work?! Blasphemy!), but it worked out well. Thank you!
This is such a great series! I do a lot more trial and error and free drawing. I also use a piece of string to measure how long I want the gusset. I also tend to number like Jodie and keep all my attempts in a row, stuffed, next to the pattern pieces I used. And sometimes the fail attempts become something else.
i am in awe of your technical skills. i’ve avoided gussets so far, mainly down to the materials i choose to work with. felted wool has so much give in it, it’s really easy to almost mold a shape as you stuff it will expand in all directions. a bit of a cheat really ; )
Fantastic. I am really enjoying this series.
I have only ever made one toy that had anything you could describe as a gusset – it was actually the base of my monster.
I made it up as I went, and it did work, but this gives me a much clearer idea of how to approach adding dimension to my toys.
Very very clear and helpful. Thanx!
Thanks for showing how it works…. I kind of just figured it out myself but now I see how it REALLY is ment to be it kind of makes a little more sence!! Aha, the light goes ‘ping’! thanks!!
Oh wow, what a fantastic series! Thanks so much for adding this to the One Pretty Thing Flickr pool- I’ll be linking. And I plan on going back and reading all of these- so excited! I would love to improve my soft toys!
thank you thank you thank you for doing this series! i just found it and wish i had found it before i attempted making a stuffed animal for a relative recently. i ended up winging it and had to make compromises. next time, though, i won’t have to compromise!
I was wondering if you ever use darts for construction? On some things, I’d like to make parts rounder, but I don’t necessarily like the look of twin gusset seams running along the center. Hmm…
Yes! I need to put together a post about darts. Triangular darts are particularly useful for making parts rounder. And there are certainly times when having all those gusset seams is not ideal. Thank you for the suggestion!
This fox is so adorable. Do you ever sell your patterns? My friend, whose husband’s last name is Fox, is having a baby, and this would make such a sweet baby gift!
Thank you so much for the helpful tutorial! I’m starting my own Etsy shop and made my own pattern, but couldn’t figure out how to make a head gusset work. Thanks to your technique, I was able to make a perfect one the first try! Thanks again!
Little Chickadee Arts
Hi again. Something I am not understanding. I’m not getting where you are measuring from for the length, as the gusset looks longer than from the tip of the nose to the nape of the neck. Also do you measure this in a diagonal? I can see from the markings how you get the width but there are none for the length and I am confused. I can’t see from the finished fox where it ends either. Thank you for your help!
Hi Sara, Use a measuring tape to measure the distance along the body piece from where you want the gusset to begin to where you want it to end. Transfer that measurement as a straight line onto a piece of paper. That's the length of the head gusset. Does that help?
Thank you – I hadn’t got it right but I think I do now. I’m going to be putting it all into practice in the next couple of days.
It isn’t working out at all for me. I can’t judge when I should be moving the paper around and I’m sure there is some overlap, also I still have space to spare at the end of the length of paper. (The length fits around the animal shape from where I want to start and finish the gusset so it isn’t that). The paper keeps moving too. I have tried marking where I have drawn from to keep track but it doesn’t seem to work out at all. The shape is not really what I want either. I have two of the books you mention and one says the gusset should have a width of half the way down from the top of the animals head and the other 2 thirds of the way down. No one mentions if there needs to be a seam allowance added on. It all seems very arbitrary and once the length is arrived at it all seems to be guess work. Somehow I was managing better with less information as I was judging it all by eye. This way you can’t really see what you are doing in relation to the whole and I’m ending up with something really weird. I’m sure there must be something I am doing wrong but in so far as I can make out the instructions (which are all similar) I can’t get it to work out which is very frustrating. I would like a bit more knowledge of how you move the paper shape around – like how much do you draw at once? (I’ve tried drawing all that is there at that stage and also, drawing just a little and then edging forward. Neither seems to work out. I end up with a skinny little bit at one end which goes on and on without tapering and is obviously of no use. To taper would mean removing the shape and going underneath it. (Well that was my last attempt – I get something completely different each time)I’ve tried and tried. Yet I’ve drawn a free hand one which looks like it might work but I don’t feel that is the answer as i won’t know what I am doing for next time.
I hope your book will have fuller instruction than what I have purchased. One of them mentions not having the space. Instruction is only good if it covers ALL you need to know.
Please don’t feel you need to answer me, but I did want to tell you that for some of us it is very difficult and doesn’t come naturally. I’m not wanting to be a pest, I must just accept I can’t do it. It is very disappointing if the books we buy don’t have ALL the information you need as it makes them pretty useless as well as being very demoralising leaving you feeling more stupid than when you started.
Hi Sara,
I can relate very well to your frustration. I think in the end this really is a trial and error situation. If the methods you've read about aren't working for you, I suggest that you turn to a soft toy pattern you've made in the past and have admired. Pick one with a head gusset. Copy that head gusset shape exactly, lengthening or shortening it to fit the body piece of the toy you are designing, but otherwise keeping the shape. Sew your toy and see what you think. Then go from there. If the nose is too wide, narrow the tip of the gusset. If the crown of the head is too narrow, widen the center of the gusset. Most gussets begin life as a pointed oval and then are refined from there, bringing the contours in and out symmetrically to create the shape of the head. But the reality is there is no tried and true method for three-dimensional toy design that is full-proof and works every time. A big part of this is experimentation. I hope that helps!
Abby
Thank you so much for your helpful and useful answer to my rather stroppy comment, it’s much more than I deserve. Thank you very much. It helps to know that it is a matter of experimentation. Actually I am trying to run before I can walk as it is a long time since I have sewn a toy from a pattern and it only recently became something I am wanting to do again. I have made a successful rabbit so I shouldn’t be too disheartened I suppose. I am going to get some patterns together and learn from the bottom up. I like your advise about using the gussets from other patterns and developing them from there. I think that would be a very good learning curve.
Thank you for your patience and all the help you have given me.
My pleasure, Sarah. Good luck and keep in touch!
Abby
Hello I came via the ‘Friday fail’ posts and found your wonderful series on soft toy design. I noticed you were using a measuring tape around curves, and thought you might be interested in something I have found useful for measuring curves. Recently I used a Map Distance measuring wheel, and it worked amazingly well for the purse gussets – hope it’s ok to include a link – http://sewmentalmama.blogspot.ie/2012/11/hello-kitty-purses-and-unexpectedly.html
See what you think.
Angela
Wow! What a cool and useful tool! It's going on my list!
You make it seem so simple! I realise now that I make it *way* more difficult then it has to be. It’s really hard to explain, but it involves rules and straight lines. Lovely creature as always.
Your website is AMAZING! It is hard to find anything on creating a pattern yourself, so thank you!
I am trying to make a small dragon. I want the gusset to be in the front. (Not the bottom or the head, well kind of the head too, I guess) I’m going to try this approach. 🙂
Thanks again!
I'm so glad to hear that, Amanda! This series became a book that will be released May 7, 2013. It's all about how to design your own stuffed animal sewing patterns! I hope you'll find it useful!
Abby
SO helpful. I think it took me four or five, possibly more attempts, but I think I now have something that I can work out with muslin. For months I’ve been looking for the advice and drawings exactly what you’re showing – THANK YOU!
ps. I just bought your book too! 🙂
Thank you SO much for your generous help through your blog and website. You have really helped the quality of my animals, esp. with the leg gussets. I could never figure out why my sheep’s legs were so splayed!
Seems so obvious now!
Just bought your book–there’s no stopping me now!!