
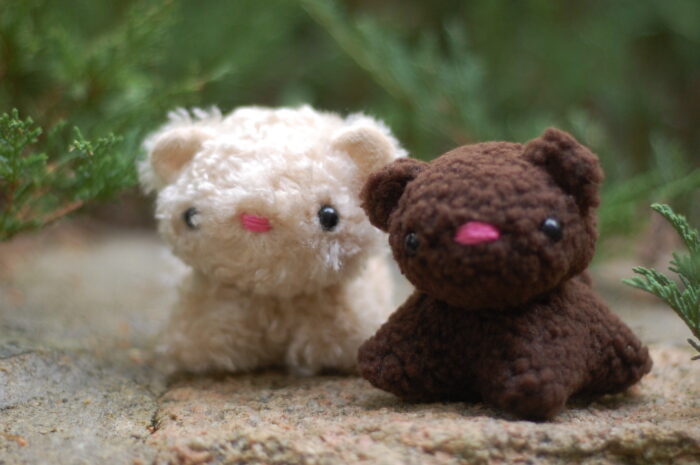
Meow! Tiny Kitty is here to say hello. She fits in a tea cup! Sew her from a single pattern piece. Yep, she’s made from a circle. So simple.
Ready to make one? Here we go!

Gather your supplies. Faux fur scraps are perfect, but fleece or wool work, too. If you don’t have safety eyes, use some black embroidery floss.
Download the pattern template
Tiny Kitty Pattern. You’ll see that it’s just a circle, with a half circle for the ears and tail!
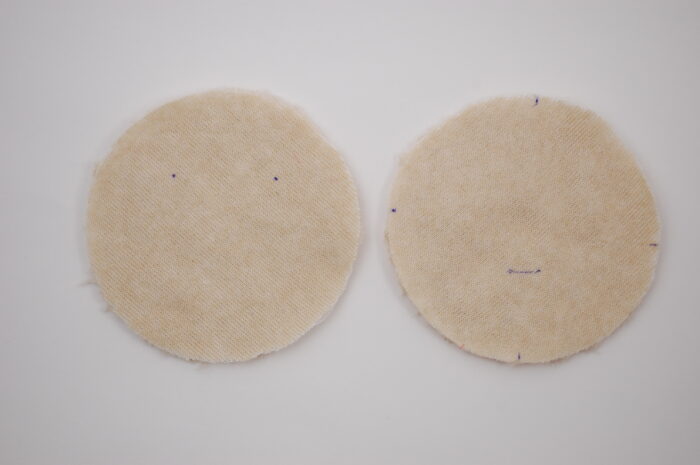
Cut two circles. Transfer the markings for the eyes onto the back of one circle and the markings for the legs and neck onto the other.

Use an awl or the tip of a scissors to poke holes for the safety eyes. Or embroider the eyes now if you’re not using safety eyes.

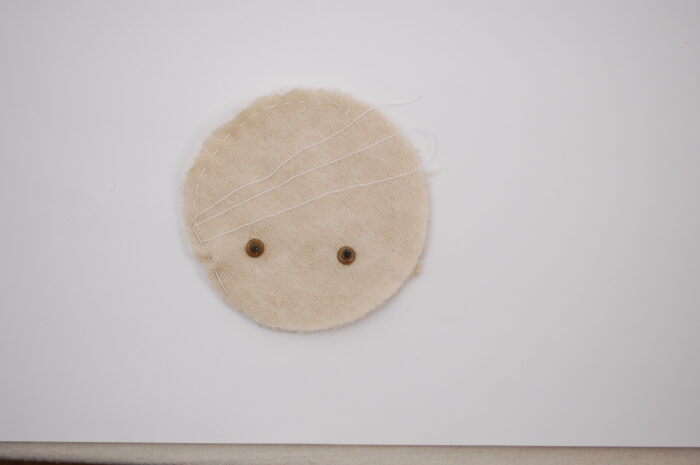
Attach the eyes. Cut the neck slit.
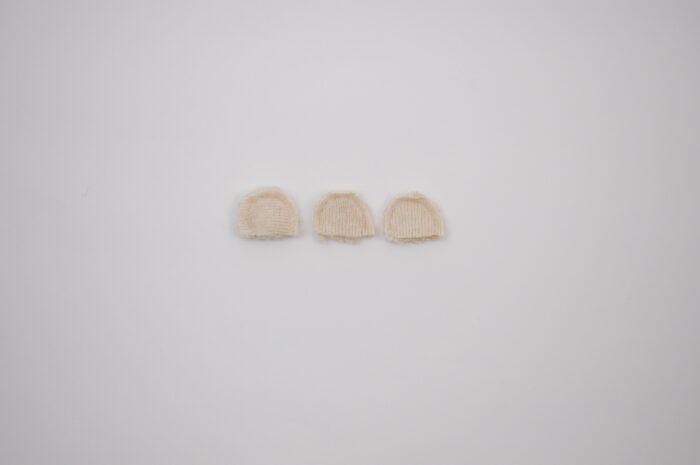
Now let’s make the ears and tail so they’ll be ready for later…
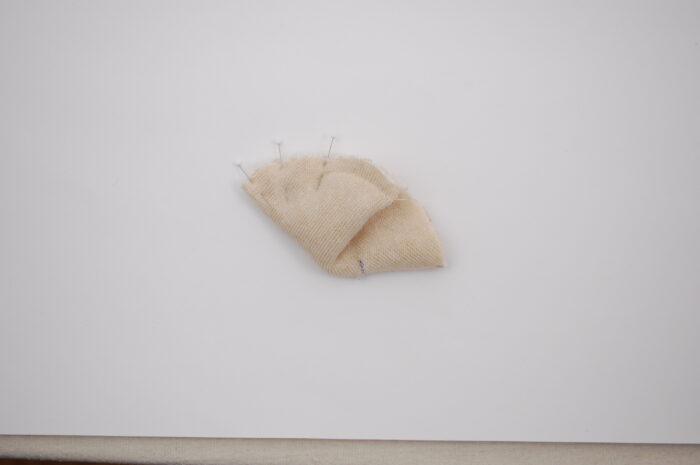
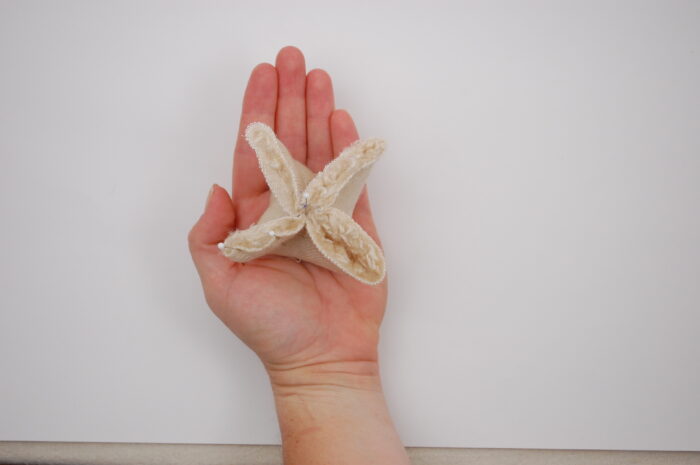
Cut 6 half circles. If you’d like, choose a different fabric to line the ears such as fleece or velveteen. The tail should be two layers of fur.
Sew two ears and one tail. Clip the seam allowances and turn them all right side out. Fold the raw edges under.

Make a running stitch all the way around the circle with the eyes.
Roll some stuffing into a ball. Push it into the head. Pull the running stitches tight to gather and tie off the thread with a double knot.
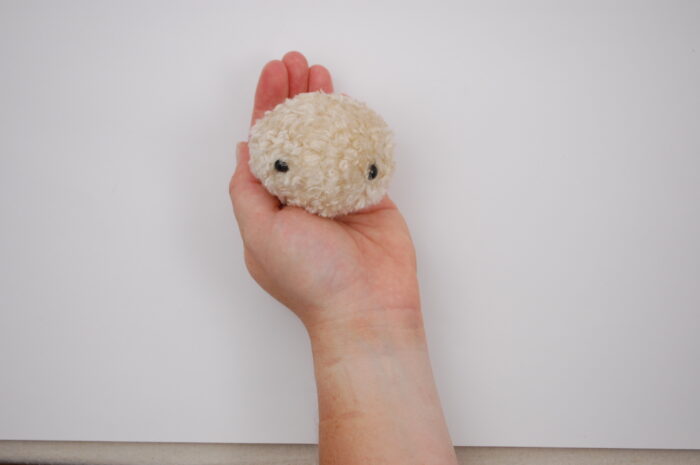
Now you have this! Use pink embroidery floss to satin stitch the nose, hiding the knots at the base of the head. If you want to sew the ears on now, go for it! I like to wait until the whole cat is assembled before I decide where to place them.
Time to work on the body…

Fold the body circle in half. Pin, then stitch, from the top down to the first mark.
Fold the stitched section to the center. Pin, then stitch.
Repeat for the bottom half of the circle. Here’s how it looks just before sewing up the last leg.
Clip the seam allowance. Turn the body right side out through the neck slit and stuff it firmly.

Close the neck slit with ladder stitch. (Don’t worry if the stitches aren’t perfect. They’ll be covered up by the head.)
Pin the head to the body covering the neck slit. Ladder stitch in place. Pin the ears and tail to the body and ladder stitch those in place, too.
Pick up your Tiny Kitty and give her a tiny hug!


You make it look so simple. I’m not a seamstress AT ALL but I believe I can make this! Thank you Abby!
Suh-weet! The brown one reminds me of Brownie Bite:
http://cuteoverload.com/2010/10/30/brownie-bite/
This would be so great for a kids class intro to soft toys!
GET. OUTTA. TOWN!!! SHUT. THE. FRONT.DOOR!
How clever is that?!!!!!
2 circles.
Who woulda thunk it?
hmmm.
flabbergasted.
You’re so welcome! Enjoy!
Oh my goodness, you’re right! That website is way too full of cute. Hello Brownie Bite!
It would! It’s simple and doesn’t require a lot of materials, but you still learn some great techniques like gathering, cutting a slit for turning, and using safety eyes!
It was a kinda “ah ha!” moment when this occurred to me. I had seen a vintage pattern made from a square and a circle. I tried sewing it, but the square made the legs really pointy. I figured I was doing something wrong to so I tried again, but still pointy. Then I realized that the square should be a circle! And that using the same circle would make a big, super cute head. Hooray!
This is really sweet and clever!
Oh my goodness! What a cutie!! I’ve linked to your post over at Craft Gossip:
http://sewing.craftgossip.com/?p=66948
As I type this, I have my own tiny kitty curled up in my lap. 🙂
–Anne
Thank you so much, Anne!
Thanks, Esther!
Genius! Simplicity is the key – I shall keep this one in mind next time I have to organise a craft project at the infant school where I work as I think it would be fantastic.
Hello,
I really like your tutorial!!
I tried to subscribe twice but I didn’t receive a confirmation email.
I really would like to receive your newsletters.
it’s so fluffy and adorable!!!! 🙂
Hi,
I’m sorry you were having trouble. I’ve added you manually so you should be all set now! Thanks so much for hanging in there,
-Abby
I love the design with the two circles – simple, yet ingenious. And it’s quick to make too – I made one over the weekend (you can see it on my website). You could easily adapt this to make other cute animals too – a puppy or a rabbit, anyone? Thanks very much for the tutorial!
You’re totally right, Ruth! I’ll have to make a bunny in the spring. I love your Perry the Kitty!
Sooo cute!! 🙂
This looks easy and doable. Very clever pattern. I liked, plussed, pinned and tweeted 🙂
Oh! No way! That is just brilliant! I have an old boucle sweater piece just waiting to be upcycled. I may have to make this with an elf cap as a Christmas ornament for a swap I know is coming up. What a fabulous design. Thank you so much!
Merci,j’aime beaucoup !
bonne journée
This is just brilliant! Well done! I know a bunch of little girls who will be receiving these for Christmas. Thanks for sharing!
Thank you for the pattern! I made 5 little black cats to go in these little stuffed animal sleeping bags (http://applecyder.wordpress.com/2012/10/08/sleeping-bags/) for an upcoming camping trip. The kids will LOVE them!
Hello!!
Thank you so much for the template! I made one and gave it to a friend (http://saphiracraftsanctuary.wordpress.com/2013/12/03/meoooowwwww/). She LOVED it! Thank you, once again!
I love making stuffed toys … Have for more years than I want to remember. Old, you know … LOL That is absolutely adorable!!!! Must make it!! Just found you via Sew Can She and am signing up for your newsletter! Thanks for sharing!!!
Great to connect with you, Rosemary! Thank you so much!
Oh he’s so adorable. Thank you.
Awww! This is just so cute! I’d love to make one, but the pattern link isn’t working for me : (
Ack! I’ve just moved my site from Typepad to WordPress and it looks like this file didn’t come over. I’ve added it now so you should be all set! Thank you for your patience.
Hi!
Love this Tiny Kitten pattern! I am attempting to make one, but the ear/tail piece seems really, really little, too little (for me) to sew/stuff. When I print, he circle comes out to about 5″. Did I print the pattern out incorrectly? Or can I just make the ear/tail piece bigger? I usually make quilts, so I’m new to stuffed things 🙂
Thank you for any help,
Lori
You’ve printed it properly. It’s very small! The kitty fits in the palm of my hand once it’s all finished. If you’d like to make the tail and ears larger, go for it! Or, print the entire pattern larger. That would work, too. Sewing small parts is often part of making softies and dolls. I love hemostats for turning and I use freezer paper for sewing. Take a look at the Softie Sewing Tutorials category under Sew With Me here on my blog for some tips. Thank you!
Sorry to necro this but I am looking to make around 30 of these for a kitten cam conference that we have every year. I’m struggling with the instructions for the body and the tail puzzles me as you don’t show it. A semi-circular tail?
Can you remember this well enough to help?
Thank you.
Lyn
Hi Lyn, The body is made from a circle. There isn’t a tail in this pattern, although you could make one if you wanted to.
Hi Abby, the tail is mentioned in several places – Now let’s make the ears and tail so they’ll be ready for later…
Cut 6 half circles. If you’d like, choose a different fabric to line the ears such as fleece or velveteen. The tail should be two layers of fur.
Pin the head to the body covering the neck slit. Ladder stitch in place. Pin the ears and tail to the body and ladder stitch those in place, too.
Ah, you’re right. Forgive me. I was replying quickly and didn’t take the time to really go back and look at this tutorial. The tail is the same as the ear. It is the same semi-circle template. I’m sorry that wasn’t clear!
I’m having a lot of trouble with stitching the body- I get the corner stitch, but when I try to fold/stitch and turn it right side out, there seem to be stitches in places there shouldn’t be and the body comes out closed off and just wrong. I’m a beginner, but the head came out great!
I made two of these, (one long-hair, one short-hair,) for a couple of little girls’ birthday. But I used a slightly larger isosceles triangle for the ears & tail, instead of the half-circle. They were a hit.
Sadly, I was running short on time & didn’t get pictures of them.
Sounds adorable!