Editor's Note: This series of posts became a book!
Stuffed Animals: From Concept to Construction was published by Lark Crafts in 2013.
+++++
Jointed soft toys are a lot of fun because they have moving parts. And moving parts imply play. I like the retro look of a simple jointed toy, too. And they are not difficult to construct so even beginning soft toy pattern makers can come up with something charming.
There is no undergusset or head gusset to fiddle with on this kind of toy. The body is fleshed out with one long 1/2" band of fabric that is sewn all the way around, joining the two side body pieces. And the legs are held on with button joints. The only special tool you'll need beyond those we've already discussed is a 4" doll needle.
For this project I decided to make a pig. I did some visual research and then I did some sketching. I focused on getting a solid profile of the pig's body, plus simplified outlines of its legs, ears and tail.
I transferred my sketch to freezer paper and cut out and labeled the pattern pieces. Here they are:
Next, I ironed the freezer paper to fabric and cut out the fabric 1/8" from the pattern pieces.
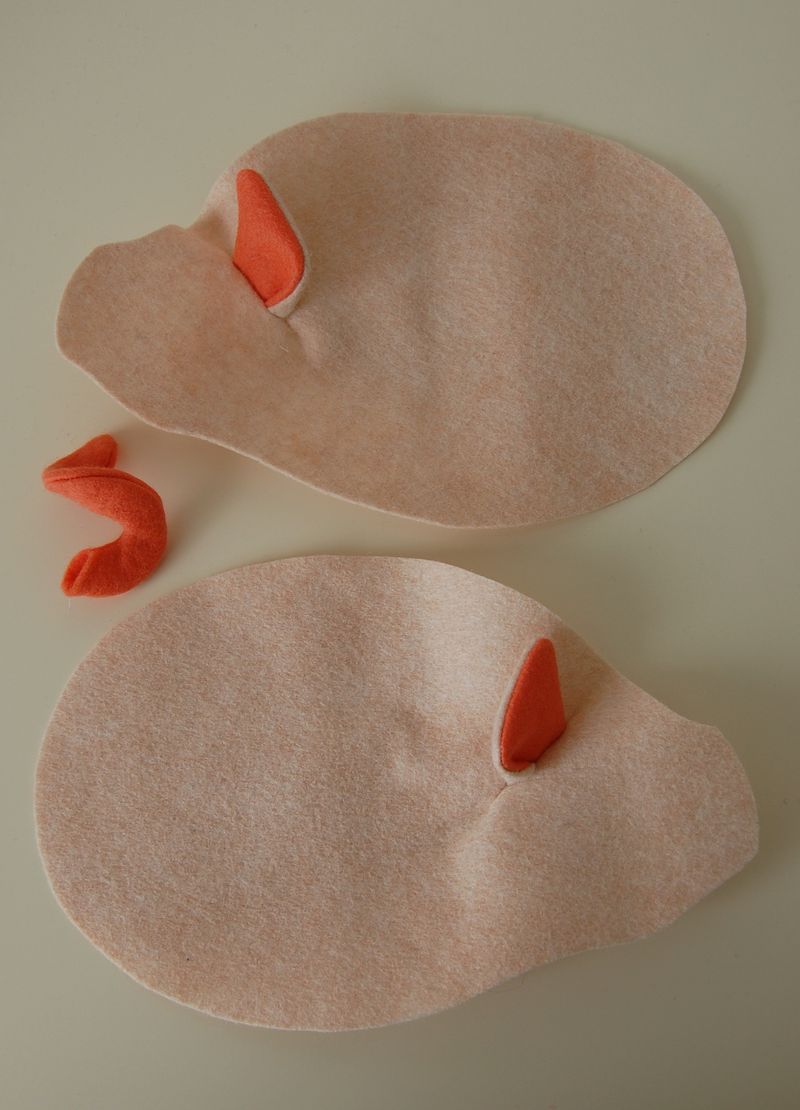
I stitched the tail together, leaving an opening at the end for turning. And I turned the tail right side out.
I stitched the ears together (with one lighter and one darker piece of felt) leaving an opening at the bottom for turning.I turned the ears right side out and inserted them into a slit cut into the side body pieces. Then I stitched over the slit, catching the ears in the seam.
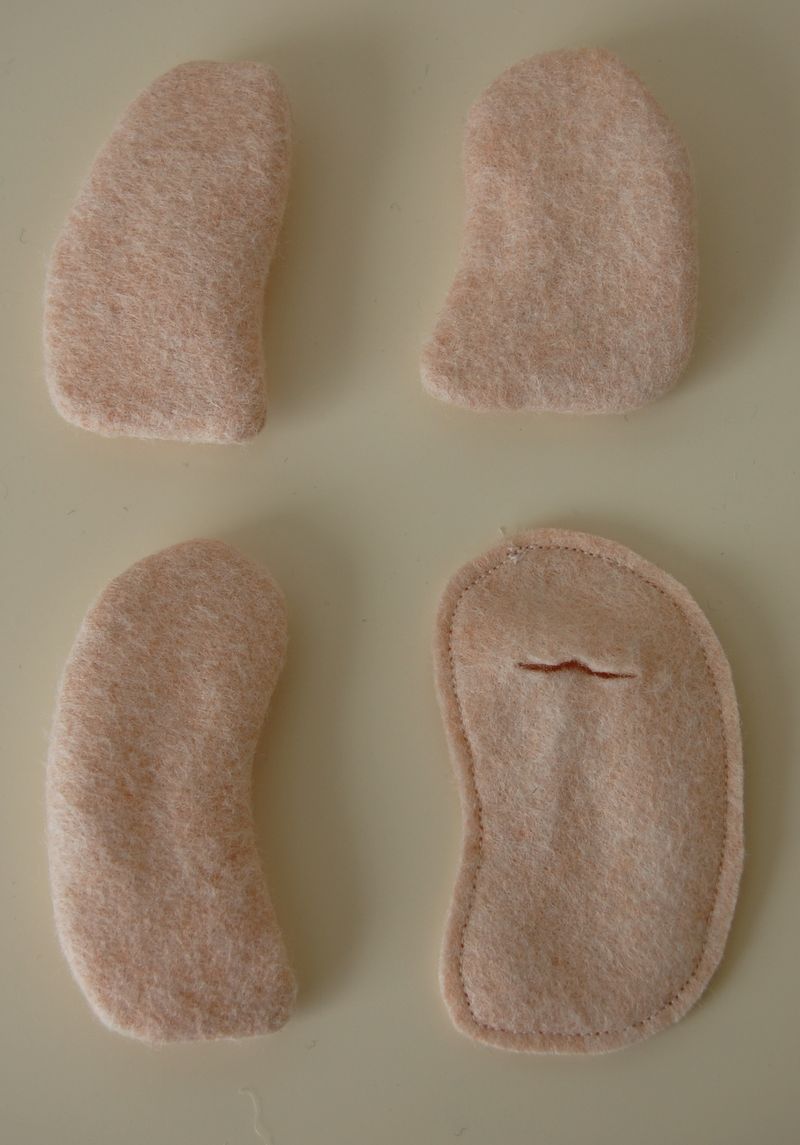
I stitched all the way around each of the four legs. I decided not to leave an opening in the legs because they are small and an opening was bound to be rather obvious, even if I closed it up really neatly.
Instead, I chose to cut a small slit on the inside top of each leg. I used this slit for turning and stuffing and sewed it closed as neatly as a could, but in the end the slit side will be flush against the pig's body and will not show at all. This way the opening will be invisible.

Next, I cut a long strip of felt that was 1" wide. This strip will be a simple gusset. It will be sewn between the two body pieces, all the way around. To figure out about how long the strip needed to be, I used a measuring tape to measure around the body. I added a little extra, though, just to be on the safe side.
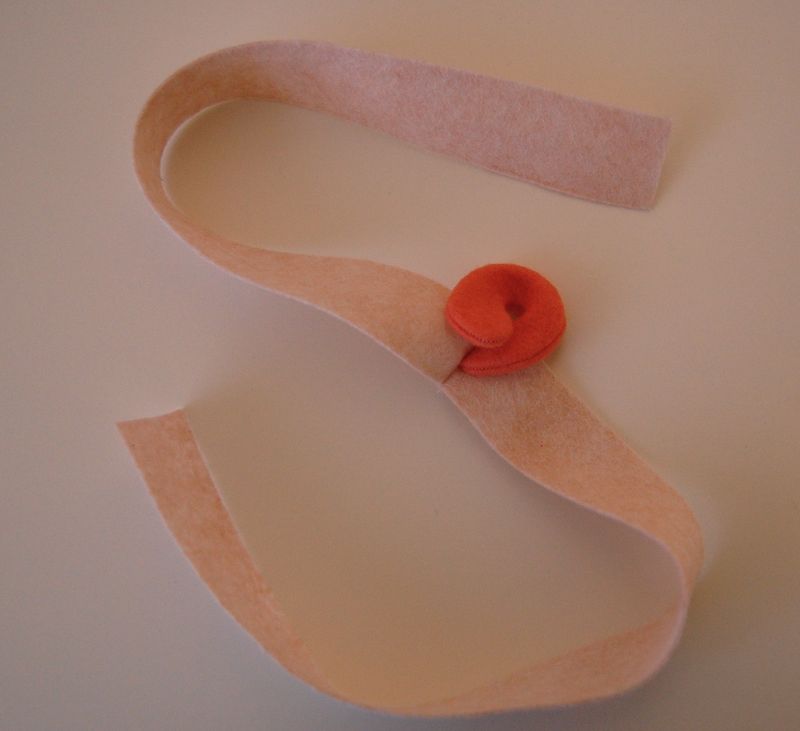
I cut a slit in the strip, inserted the tail and sewed across the slit, catching the tail in the seam.

Then, beginning on the belly of one body piece, I stitched the strip to the body all the way around. And then stitched it to the other body piece the same way.
The opening for turning and stuffing is between the two ends of the strip (I trimmed off the extra length so that just a 1/8" seam allowance remained on both ends). This way the opening is on the underside of the animal and will not be obvious.
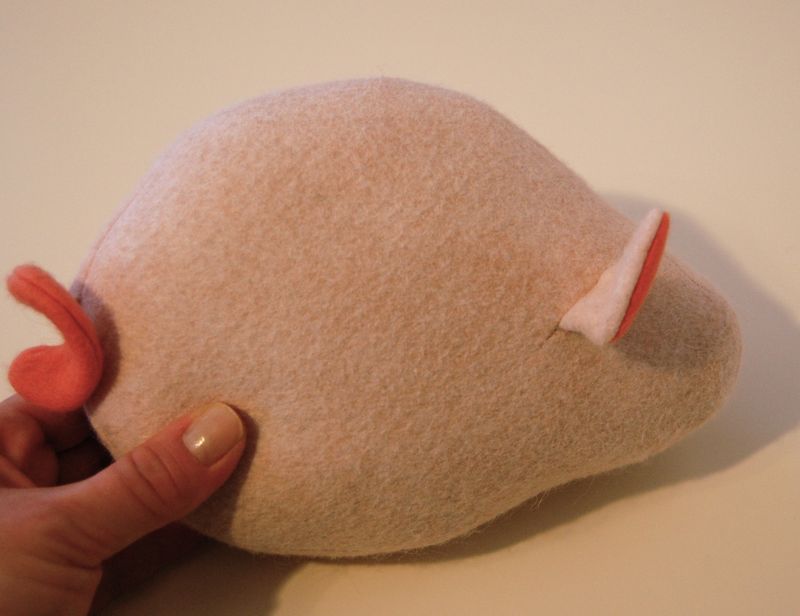
Here is the pig's body turned and stuffed.
To attach the legs, I threaded the doll needle with extra strong thread and inserted it into the body where the back legs will go, coming out the other side.

The needle then went into one of the back legs, through the button and back into the leg. Then into the body and out the other side. Repeat with the other leg.
Go back and forth a few times, tugging gently on the thread so that the legs are held firmly flush against the pig's body. Repeat for the front legs.

Now the pig is ready for some walking
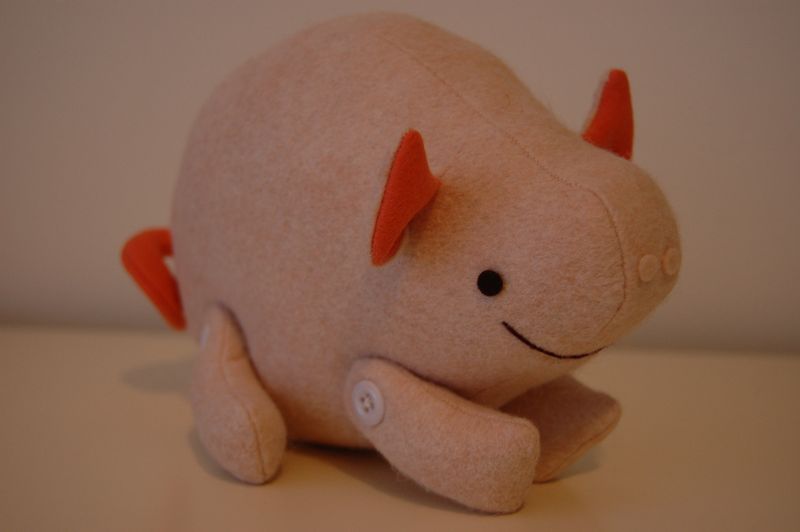
or lying down. This is a toy to play with!
Draw an animal and give it a try. And if you have any ideas or questions or different ways of making a toy like this, please let us know in the comments. I am learning so much from you all! It is great to interact with a community of people who think making original soft toys is cool. Thank you, everyone!

Ah, this is one aspect of toy making I have no problems with! I like to thread joint some of my needle felt designs; you are right there is something special about a moving toy. BTW, thank you for the article about pulling things the right way in, I am now using a long nosed pair of pliers to do my long necked geese with and it is much easier thatn the method I had been using.
I also like the tip here about leaving the little opening in the pig legs, where the thread is to go, I wouldn’t have thought of that.
When I’ve thread jointed a needle felt toy, I find that if for some reason the limbs are not totally flush or tight to the body, twirling them right round once or twice twists the thread to a nice tightness. I use really strong boot button thread even though my toys are not playthings and I doubt if the owners are going to be rough handling them. 🙂
Thank you for sharing your knowledge! This is a fascinating series. Very inspiring.
I hope you turn this series into a book because it is so helpful!
BTW – I just received your book – The Artful Bird – and it is WONDERFUL! Thanks again for sharing your talent.
Dear Abigail: I just wanted to tell you once again how much I am enjoying this series — I am learning so much. this is tremendous. thanks again, deborah k.
OOh–he’s wonderful! I love him!
That looks easier than I thought. I always wondered if legs needed eyelets for the buttons to go in, and I find myself questioning how poseable a toys made like this is? Will have to try and see.
and I meant a TOY of course. U_u
Hi V. – Button joints are very simple and I think you’ll find that the finished toy can really be played with. I hope you’ll give it a try and let us know what you think!
That is a great tip, PG! I have made button jointed legs that didn’t end up as tight as I would have liked. Twirling them a few times would surely help! Awesome. Yes, very strong thread is crucial. Nothing worse than the thread breaking after all that work!
I actually made my son a little car with just about the same method a few weeks ago. It was a first and I just made it up as I went along. Glad I wasn’t too far off.
Love this series!
You make it seem so very doable! I’d buy the book :*)
Thank you for this series, just delightful and I am learning so much!
This is great! I’m learning so much from this series. I’ve always wondered how to do a jointed toy, and it turns out it’s not as complicated as I thought! I’m assuming the buttons are there to hide the thread (or make it look better), right? They are not necessary for it to function?
I also meant to comment on your under-gussets for 4 legged creatures post…THANK YOU! The moment you mentioned darts at the leg creases, I had an OF COURSE moment.
So far, I’m a little disappointed that I don’t have too much to contribue that is different than your methods. I’m pleased to see that you start the same way I do…with an idea and getting reference photos and a sketch. Usually when I sketch, I make marks where the seams go and try to brainstorm how my new friend will be put together.
Thanks again for this series…I will certainly link back here on my blog when I use the techniques I learned here (and I most certainly will!).
Kristin – The buttons actually do serve a function. The thread is pulled really tight to keep the legs pushed up right against the body so the toy will be stable. Without the buttons, the thread would tear a hole in the fabric of the body. They are there to add strength to the joint, allowing you to really pull tightly on the thread without a risk of tearing. Thanks for a great question!
I make marks on my sketches too, as I realize where the seams will go and I start to envision how the toy will look in three-dimensions. A good point!
Thank you!
I am LOVING this series! Thank you so so so much!
I had never really thought about doing joints before, but after reading this post, I drew out a pattern and sewed him up 🙂 I’m going to google about making my knots secure for keeping those buttons in place!
<3 these lessons... Going to make my first simple jointed toy tonight!
I love the look of button jointed toys and have made several from free patterns on the net. They are so easy and so fun to pose. Now I will make my own designs. I have also button jointed (and fully jointed) gusseted animals.
I would buy the book, too!
I found you today via Pink Cheeks Studios. I’ve just started sewing plushies, following Nichol’s patterns in a book. I started with the idea of eventually making some of my boys’ drawings into plushies, and even though I can follow a pattern, I had no idea how to start MAKING a pattern. Thank you for this series, it’s been so helpful! I appreciate you sharing your wealth of knowledge with the rest of us! 🙂
Hi Nicole,
I'm thrilled that you are getting started making your own sewing patterns for softies! It's so much fun! This blog series become a book that will be out in May. It spells out in detail how to design your own patterns and I hope you find it helpful, along with this series of posts!
Best,
Abby
Wow this was really simple and I love reading this blog! 😀 Can’t wait for the book!
Thank you, Kelly!
I had made another comment on another page, but I just wanted to make sure I am noted of a response this time. You see, I am trying to make button jointed stuffed animals, but I am having a little trouble with the neck joint. I could use safety joints or cotter pins with washers, but due to a tight budget and a love for classic touches, I have to make sure even the neck joint is a button joint, but in the end the neck ends up a little floppy. Any suggestions? Thank you.
You could try adding a wire armature?
That sounds like a good idea, but how can I do that?
Also, I am looking forward to that toy hospital post on how to fix a jointed softie. It could come in handy for people like us.
You could get a book from the library about making dolls and learn.
Thank you, I will do that.
Anyway, I am still looking forward to that toy hospital post about jointed softies. When will it be posted?
They’ve already been posted since this post is from 2011. Here’s a link to one of them: http://whileshenaps.com/2012/12/how-to-repair-a-stuffed-animal-replacing-paw-pads.html You can find the rest if you look under “Softie Sewing Tutorials” on my navigation bar.
Hello all.
I’m curious, has anyone tried using elastic for the joining of softie limbs? And if so, was it successful?
I have only ever used thread, but I’m wondering about the value of using elastic. I know they sell very fine elastic at the stores. Might it be a better alternative having some stretch? I don’t know. I haven’t constructed many softies in my time. Just a thought…..
Any insights about this?