
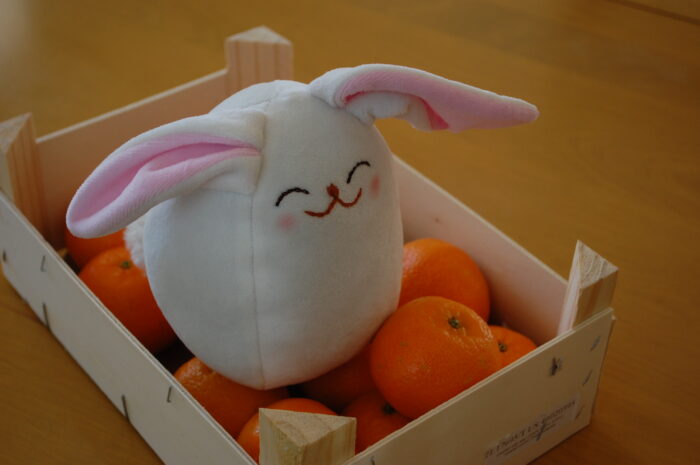
This bunny softie is easy to sew and so squishable! She would be an adorable addition to an Easter basket and would also make a great baby gift. You’ll need about an hour to make this project from start to finish. I hope you enjoy this free pattern!
To make Sophia the Bunny you’ll need:
- White pompom (store bought or homemade)
- White all-purpose thread
- 15″ x 22″ piece of white fabric (fleece, velour, or minky)
- 7″ x 7″ piece of pink fabric (fleece, velour, or minky)
- Embroidery floss in black and brown, 15 inches of each
- Polypellets and an old pair of pantyhose
- Fiberfill stuffing, 4 ounces
- Blush
Download the pattern templates and print them out. Please note that my free patterns are for personal use only. Trace the body template twice and then tape them together along the straight edge.
A 1/4″ seam allowance is included in both pattern pieces. Sew 1/4″ inside the solid lines.
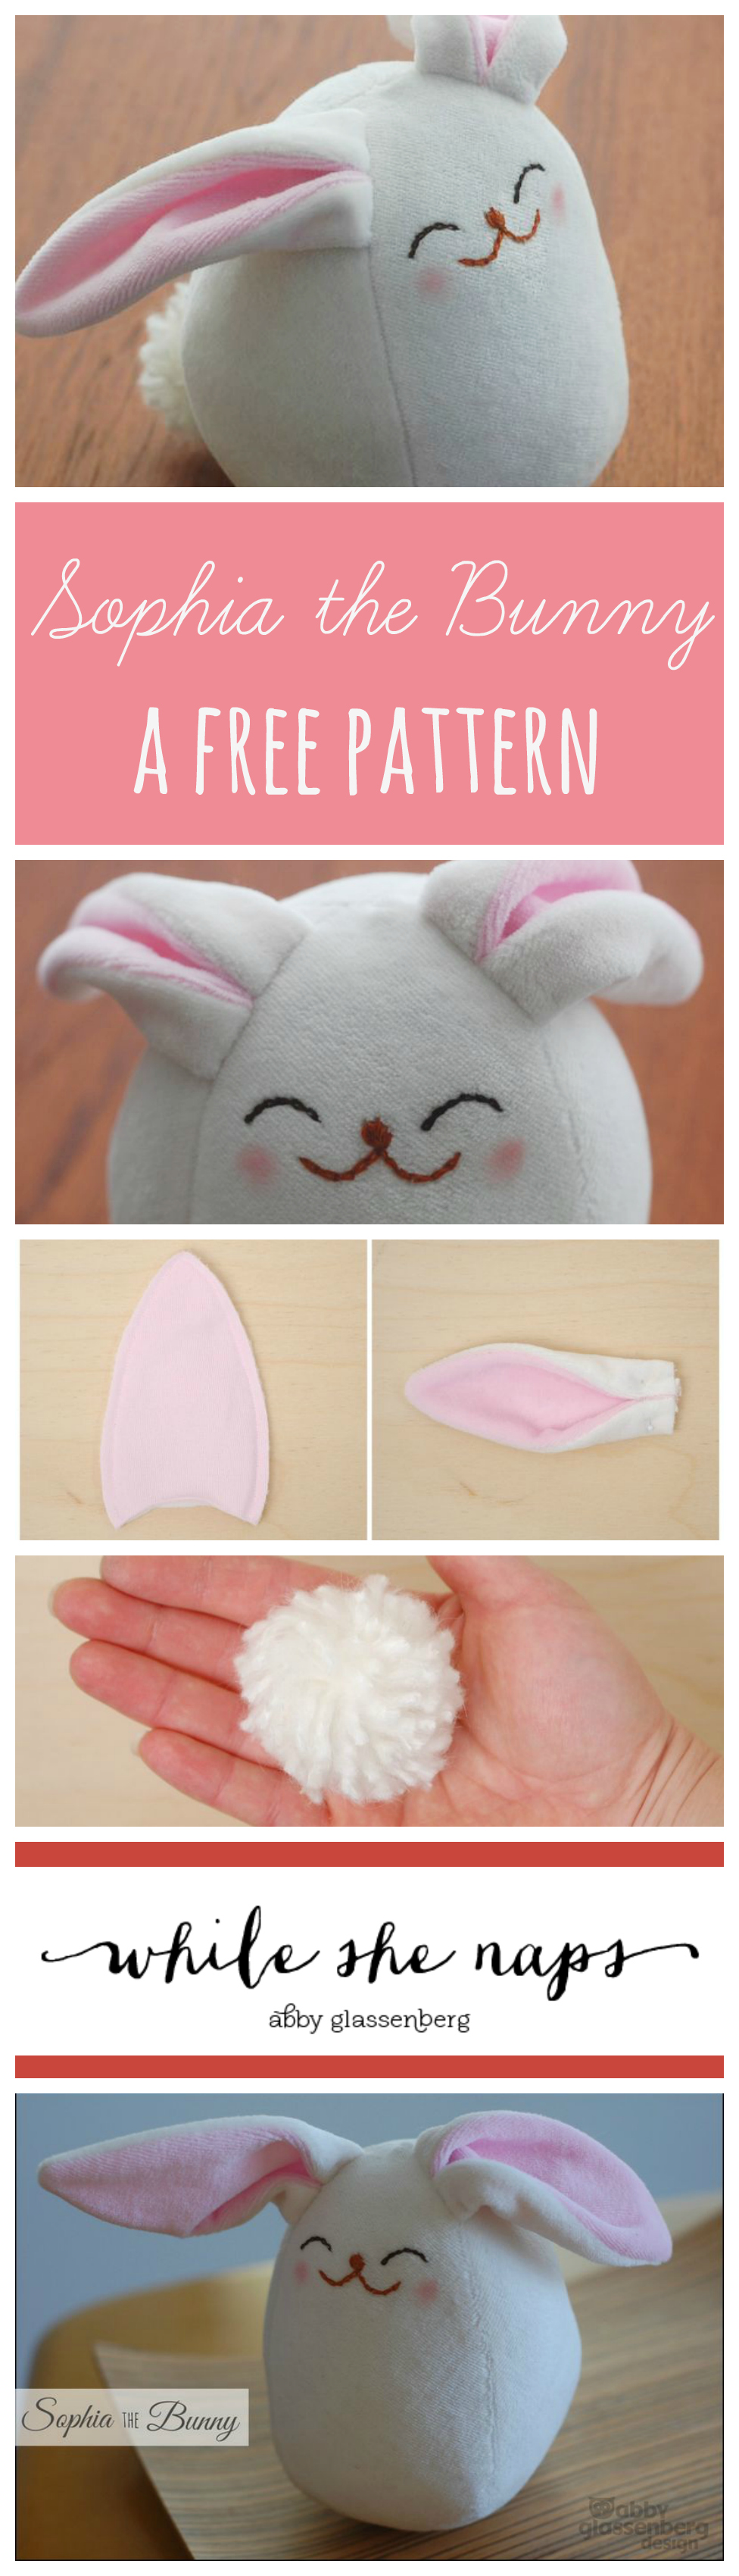
1. Cut one body piece from white fabric. Cut two ear pieces from white fabric and two from pink fabric. If you’d like to embroider the bunny’s features before sewing her up, you can do so now (see the embroidery instructions step #6).

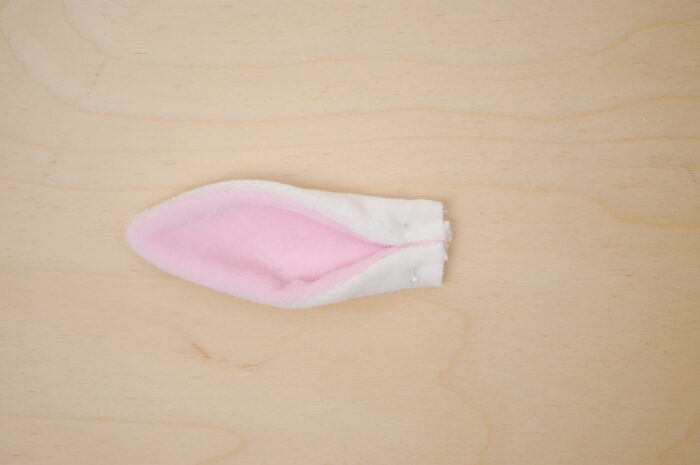
2. Place a pink ear piece on a white ear piece, right sides together. Stitch around, leaving the bottom open as marked. Repeat to create a second ear. Clip the curves and trim the seam allowance at the tip of the ear to reduce bulk. Turn the ears right side out. The pink portion will be the inside of the ear. Fold the sides of the ears inward along the dotted lines. Baste to hold.
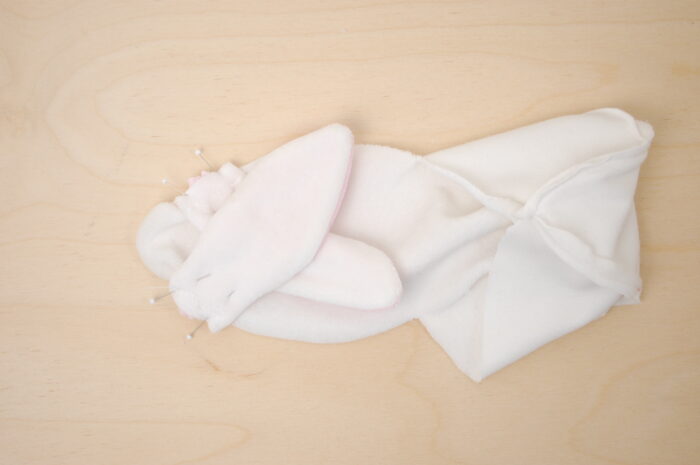
3. Place the ears pink side down on the right side of the body piece as marked. Pin in place.
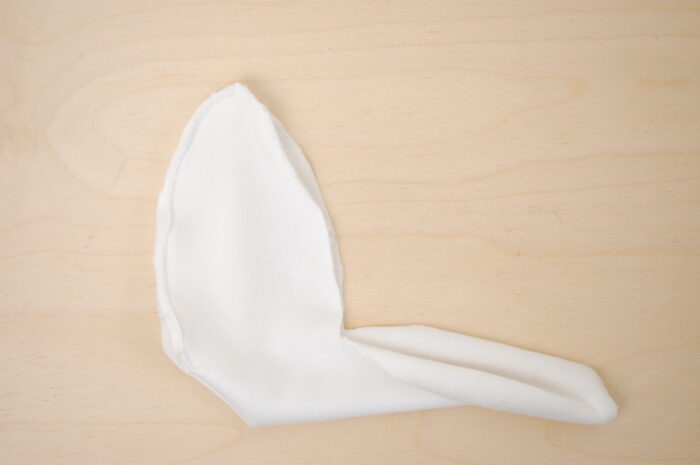
4. Bring two sides of the body together aligning points A. Stitch from point A to point B. Repeat three more times, sewing up the bunny’s body. Be sure to leave an opening as marked. Clip the curves and turn the bunny right side out. Remove the basting stitches in the ears.
5. Cut a length of an old pair of pantyhose and tie one end in a knot. Fill it with polypellets, then tie off the other end. Push the pantyhose into the bunny. Stuff the bunny firmly with the pantyhose remaining at the base to give the body some weight. Close the opening with ladder stitch.
6. Pull off two strands from a length of 6-ply black embroidery floss. Embroider the eyes with chain stitch. Pull off two strands from a length of 6-ply brown embroidery floss. Embroider the nose with satin stitch and them mouth with chain stitch. (Note that you can embroider the features before sewing up the bunny if you’d prefer.) Dab a bit of blush on the cheeks.
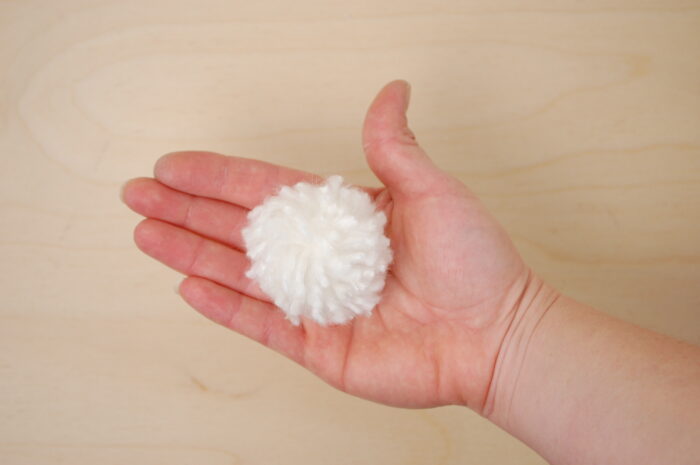
6. Stitch the pompom firmly to the back of the bunny towards the bottom and in the center.
Give Sophia the Bunny a big hug!
So cute! I’ve never used polypellets in stuffing a toy before, but I think I’ll give it a try. Looks like it would help weigh the bunny down. Thanks for the free pattern!
Love it! Absolutely adorable. I know what my 9 month old is getting for Easter!
Adorable! I will make one soon, perhaps out of felt first. Thanks so much for the pattern!
Thank YOU so much!!! At the top of my list this spring – your bunny from Stuffed Animals but how in the world could I resist this little sweetheart too?
A stuffed bunny pattern was the first thing I searched for online around 2005/6 when I started getting back into crafting!
That face!!! So sweet!! I’ve got a Craft Gossip post scheduled for later this evening that links to your post: http://sewing.craftgossip.com/free-pattern-sophia-the-bunny-softie/2014/01/09/
–Anne
Thank you, Anne!
It does. He’s almost like a bowling pin!
Oh Abby, Sophia is absolutely adorable! I just love her sweet face. That is one out of many of your talents, your ability to give so much personality to a stuffed animal in just a few curved lines. She looks sublimely pleased with herself. How do you do it?
TerriSue
hi, thanks so much for your gorgeous bunny pattern! im just wondering what size you would recommend printing it out…A4 seems to be a bit small but that is what my printer automatically gave me. Should it be printed at A3 size?
Thanks
Leah
This is the cutest bunny I’ve seen in a long time. I have lots of grandchildren who will love this for Easter. Thanks for sharing your pattern and the tutorial.
Thanks, TerriSue!
The templates are ready to print on standard-sized paper in the US which is 8.5 x 11 inches. You could certainly print it at a somewhat larger or smaller size, too, with no problem. Maybe a family of bunnies?
thanks so much abby, its all sorted now x
Olá Abby!!
Lindo o seu tutorial, muito bem explicado.
Obrigado por partilhar o seu talento.
I love the idea of a family of bunnies, Abby. This is just too cute.
I’ve never used the pellets, either, but it seems a good idea.
Thank you so much.
Thank you Abby, for the cute little snow bunny, I will be making it for a little boy in Alaska! so that is why I called her a snow bunny……
Thank you so much for sharing your creative talents with your many fans. Great to see how to handle those pellets in the tutorial, I have often thought about using them (like so many others) but now feel armed with just how-to!
I know a little Grand-Baby Girl who will enjoy this toy for Easter this year.
Janet BC Canada
Love it! would be nice if instructions were in a easy printing format along with the pattern.
Sure, Flor! If you purchase any of my paid patterns, you get a handy single PDF containing step-by-step photos, instructions, and templates.
Thanks for sharing! I’m hoping you can help – I’m really confused at the part where you say sew points A to B and repeat 3 times. I cut the body part twice then do I put the 2 pieces together right sides together? It doesn’t seem to match your picture. My first bunny turned weird LOL cause I’m not sure how to sew it into the proper shape. Thanks for all your help!
Hi Annie,
The body template is 1/2 of the full body. Print out the template and then trace it so that you have two halves. Then tape them together along the straight edge. Now you have one big body template that looks like a four-petaled flower.
Use that body template to cut one body piece from white fabric. Then fold it up (see step 4 above)and sew the petals together. If you imagine a tulip that’s all closed up, that’s the way this bunny’s body comes together.
I hope that helps!
Hello! I just found your blog and etsy site and just love your designs!! so cute! i can’t wait to make this bunny for my daughter’s easter basket!! I’m curious, how do you make the little rosy cheeks? is that actual blush??
Hi Lynn,
I’m so glad to hear that you’re planning to make Sophia the Bunny for your daughter! To blush the cheeks I dip my index finger in pink lipstick, then dab it on a tissue. Then I rub it in circles on the cheeks. It actually stains the fabric really nicely and doesn’t rub off, although I guess it might after several washings. It looks so cute, though, that I don’t mind!
This is one of most adorable Easter Bunny I’ve seen.
First one I make will be for a very good friend who
collects “bunnies” of kinds!! Big, small & in between.
Fabric (all types), wooden, paper, misc materials and
colors. Then the rest will be for grandkids & great
nieces (7) & one lone great nephew.
Your bunny is adorable and I love her face!!!! Thank you so much for sharing your fab tutorial.
You’re welcome, Kate!
Adorable. But you reference Fiberfill stuffing, 4 ounces in the things we’ll need. But I don’t see that anywhere in the instructions. Does it go around the hose insert?
Thank you.
Hi Cheryl,
Yes, in step 5 after you insert the pantyhose with poly pellets, you then use the polyfill to stuff the bunny so that the pantyhose remains at the base.
I figured it out. You use the beads as a base and stuff with fiberfill.
Thanks, Abby. Your reply didn’t show up on my computer until after I’d re-posted. This bunny is the cutest thing!
Am trying this during our snow day! Instead of tracing the body template twice and taping it together, could you fold the fabric and place the straight line on a fold?
This is so cute! I’m writing a post for my blog, I would love to include this particular tutorial of yours with the original picture and direct link.
Happy crafting!
Sure thing.
This is a really cute bunny…but I can’t seem to download the templates. Any tips?
Do you have Adobe Reader installed on your computer? It’s a free program you can download from the internet and it will allow you to open PDFs on your computer.
This pattern showed up in my email this morning on your blog post. I really didn’t feel like cleaning the house, so I found some scraps of fleece and made a bunny for my daughter’s birthday. It essentially was my first time embroidering, I tired it when I was probably 6. My chain stitches could use some practice but it came out really cute. Thanks for posting. I hope to make some to donate as well